

Kubernetes is increasingly becoming a core platform in many enterprises’ infrastructure — but as environments scale, access management becomes much more difficult.
In enterprise environments, managing access to Kubernetes clusters is often complicated: creating users manually, distributing kubeconfig files, revoking access when employees leave, and more. All of this takes time and can easily create security gaps if not handled carefully.
The solution to this problem is OIDC (OpenID Connect) — an authentication standard that allows Kubernetes to delegate identity management to an external Identity Provider. Instead of managing users directly on the cluster, you only need to manage identities in a familiar identity system — whoever belongs to a given group gets the corresponding permissions on Kubernetes automatically and consistently.
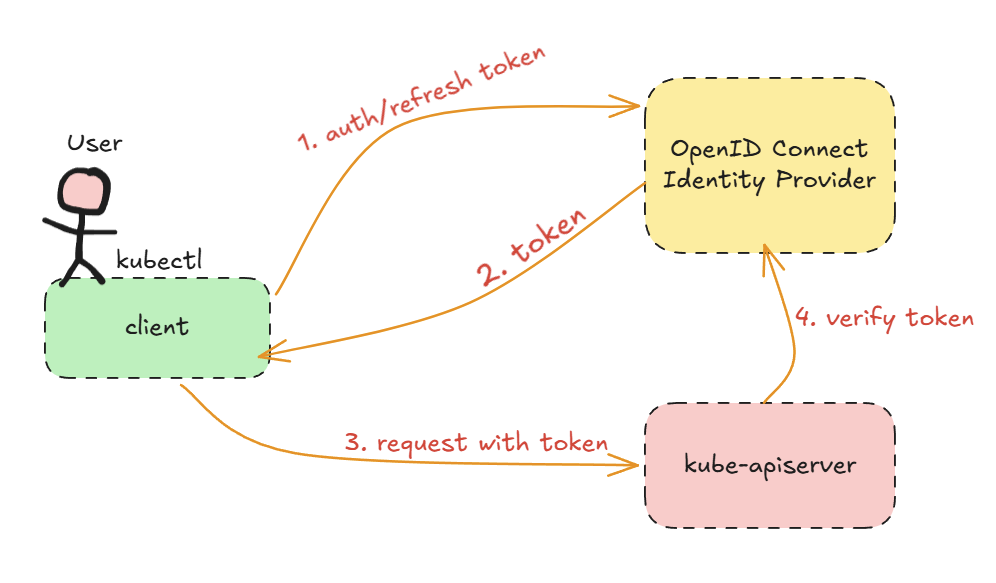
In this series, I’ll walk through integrating OIDC with Kubernetes using two common options, each suited to different environments:
Part 1 — Microsoft Azure AD (Microsoft Entra ID): For organizations already using the Microsoft 365 ecosystem and wanting to take advantage of their existing identity infrastructure.
Part 2 — Authentik: For those who want full control — an open-source, self-hosted Identity Provider that is vendor-independent and completely free.
Now, I'll walk you throught part 1: Kubernetes User Authentication with OIDC using Microsoft Azure AD (Entra ID)
Preparation
- A Kubernetes cluster where you have permission to modify the
kube-apiserverconfiguration (this article uses RKE2 to initialize Kubernetes). - An Azure AD (Entra ID) tenant where you have the Application Administrator or Global Administrator role.
- A client machine for testing that can connect to the
kube-apiserverand already haskubectlinstalled.
Configure Microsoft Azure AD
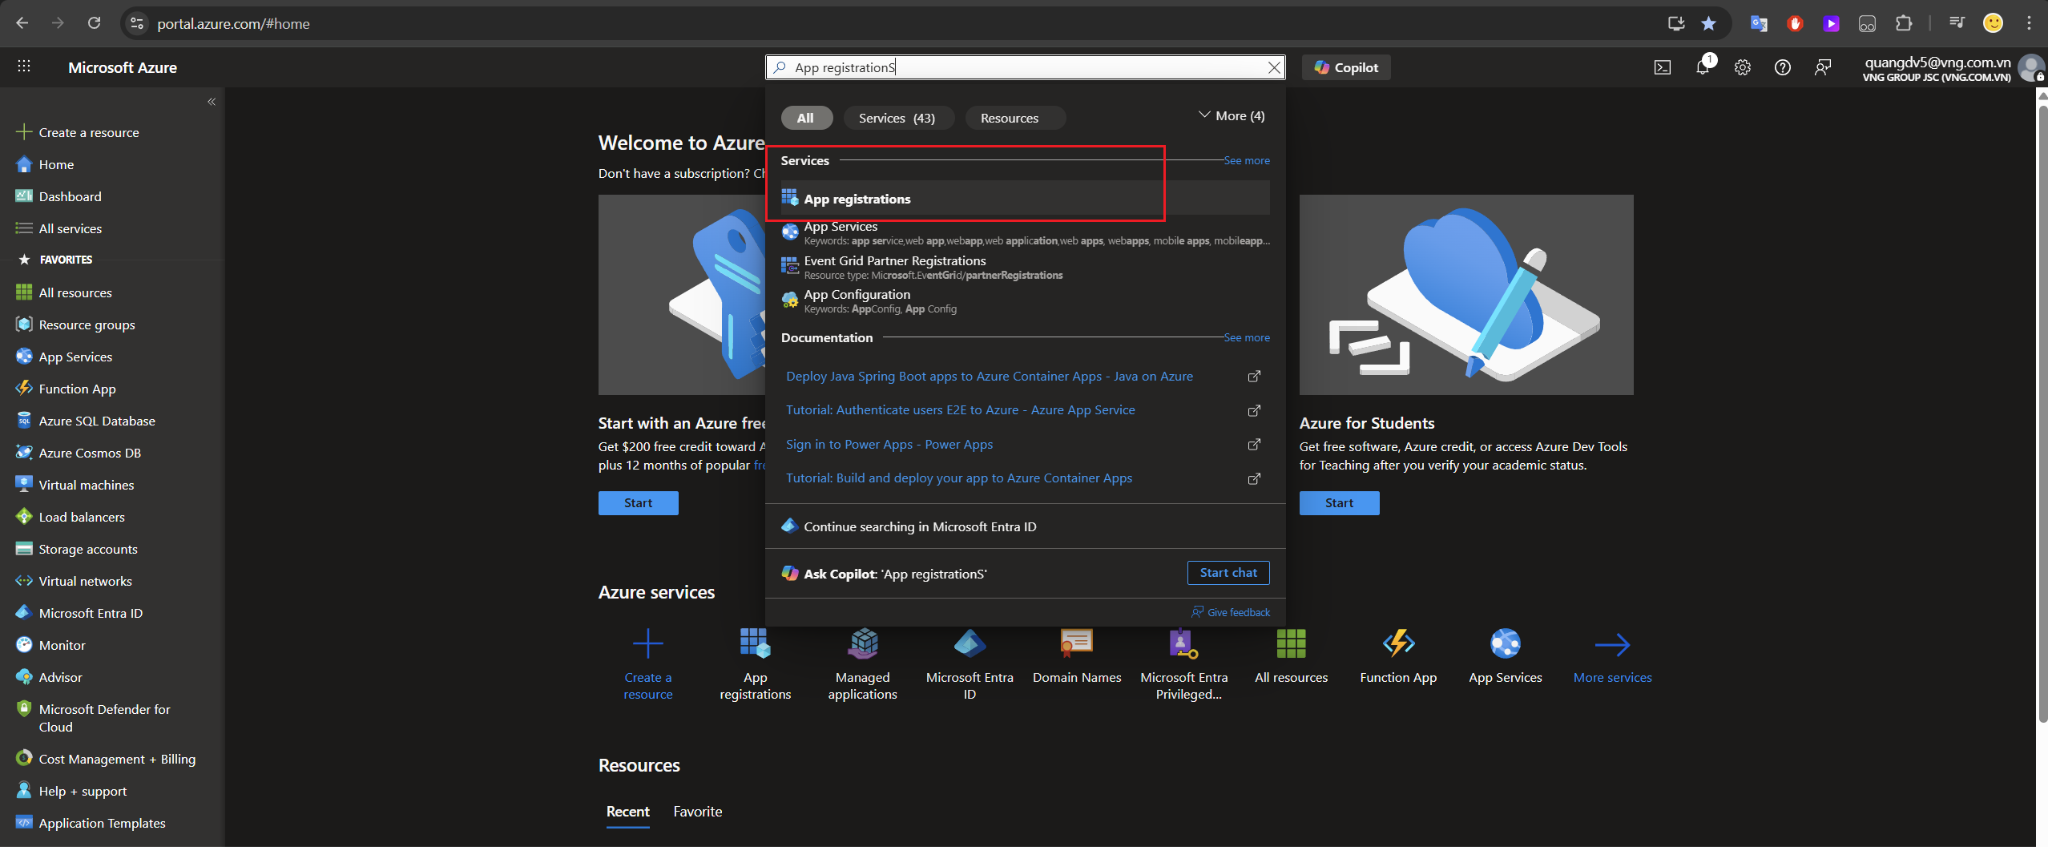
1. Create an App Registration in Microsoft Azure
Go to https://portal.azure.com/
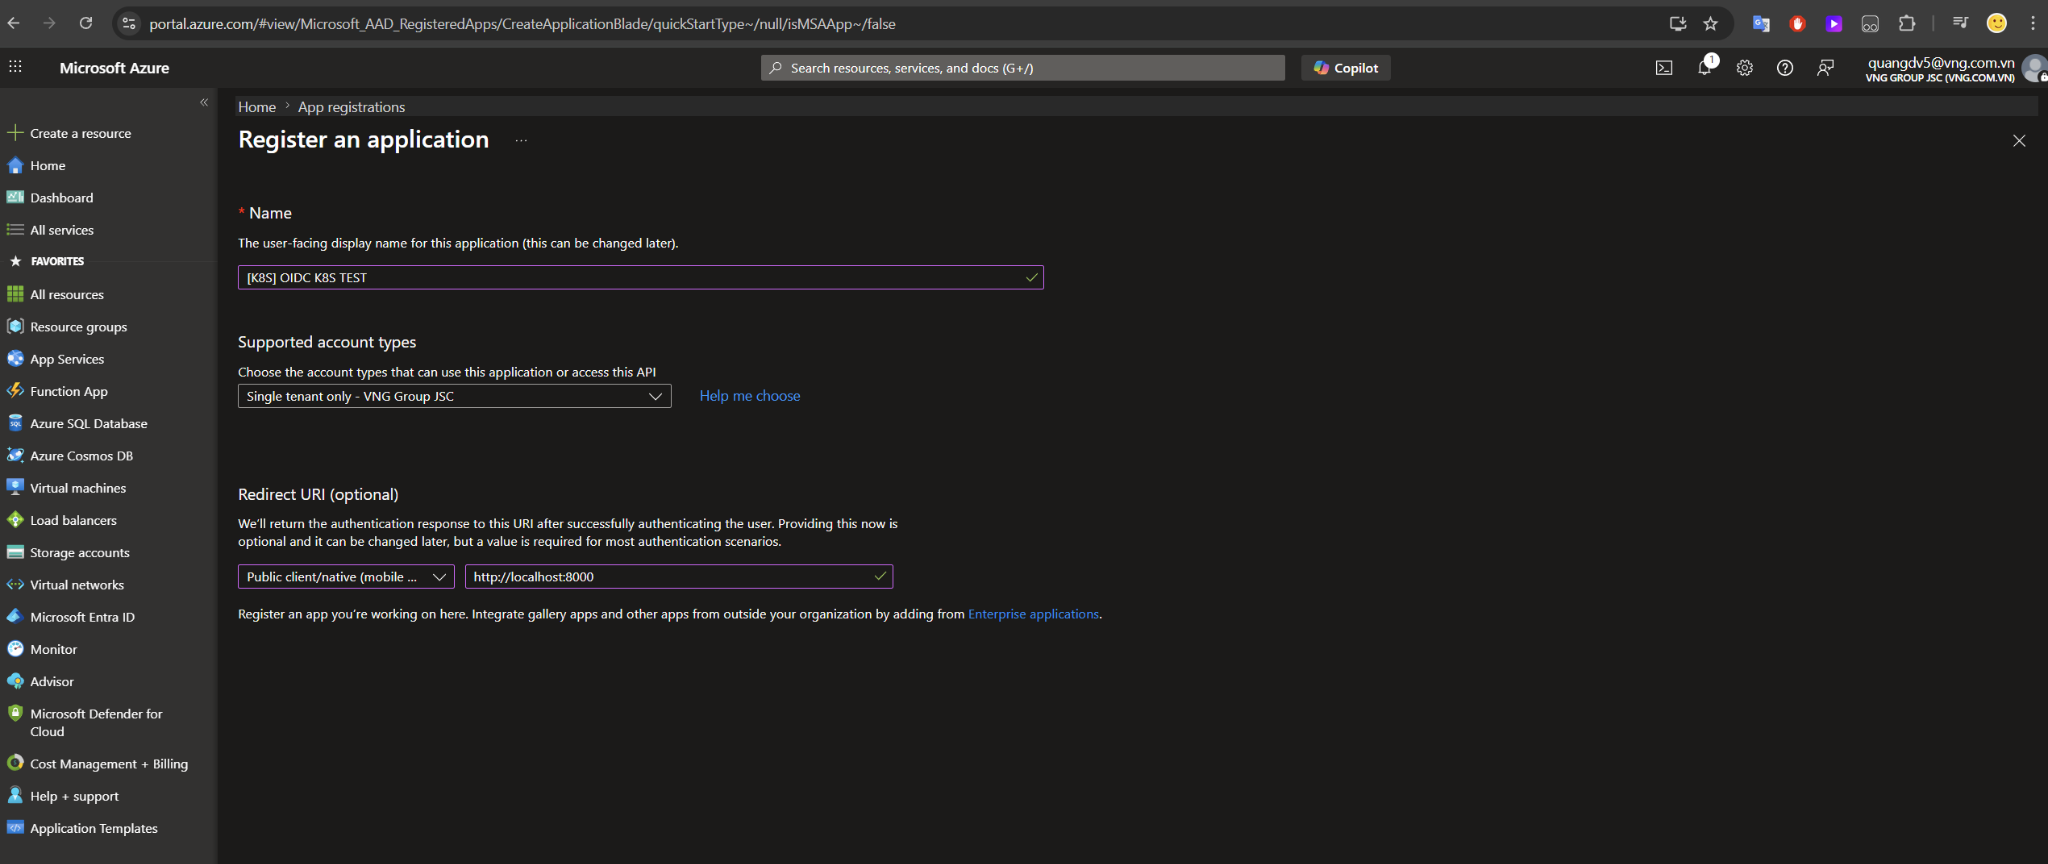
2. Fill in the application information
Under Supported account types, choose Accounts in this organizational directory only (single tenant) so that only internal accounts from your organization can sign in.
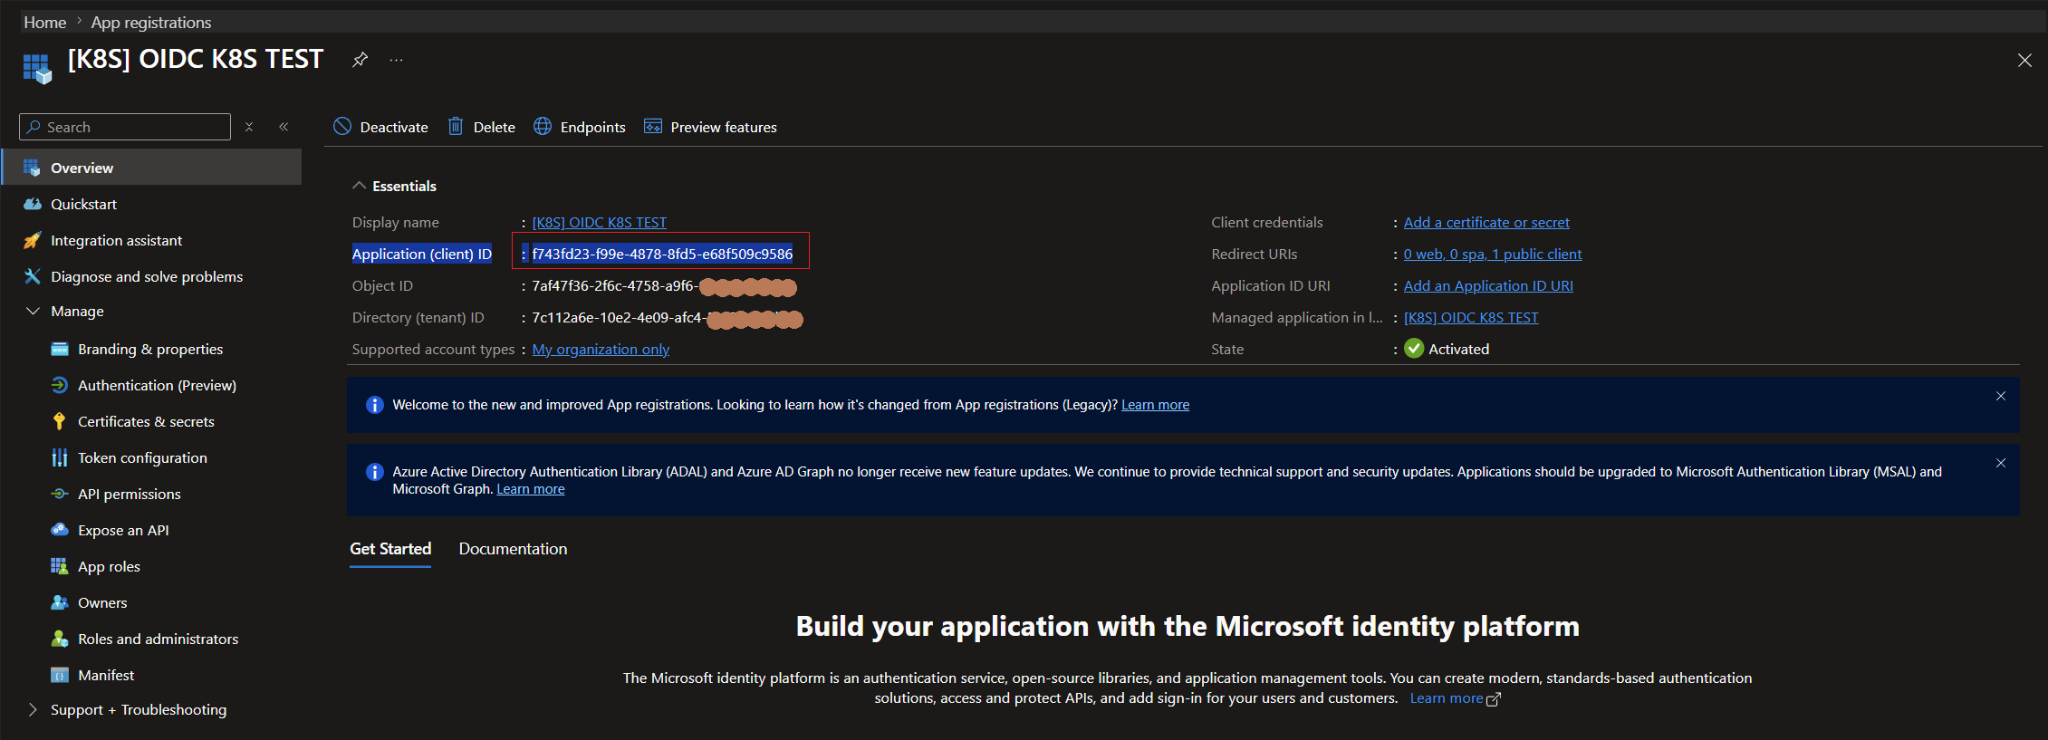
After the app is created, you will see an interface like this. Pay attention to the Application (client) ID and the Directory (tenant) ID.
3. Configure the application
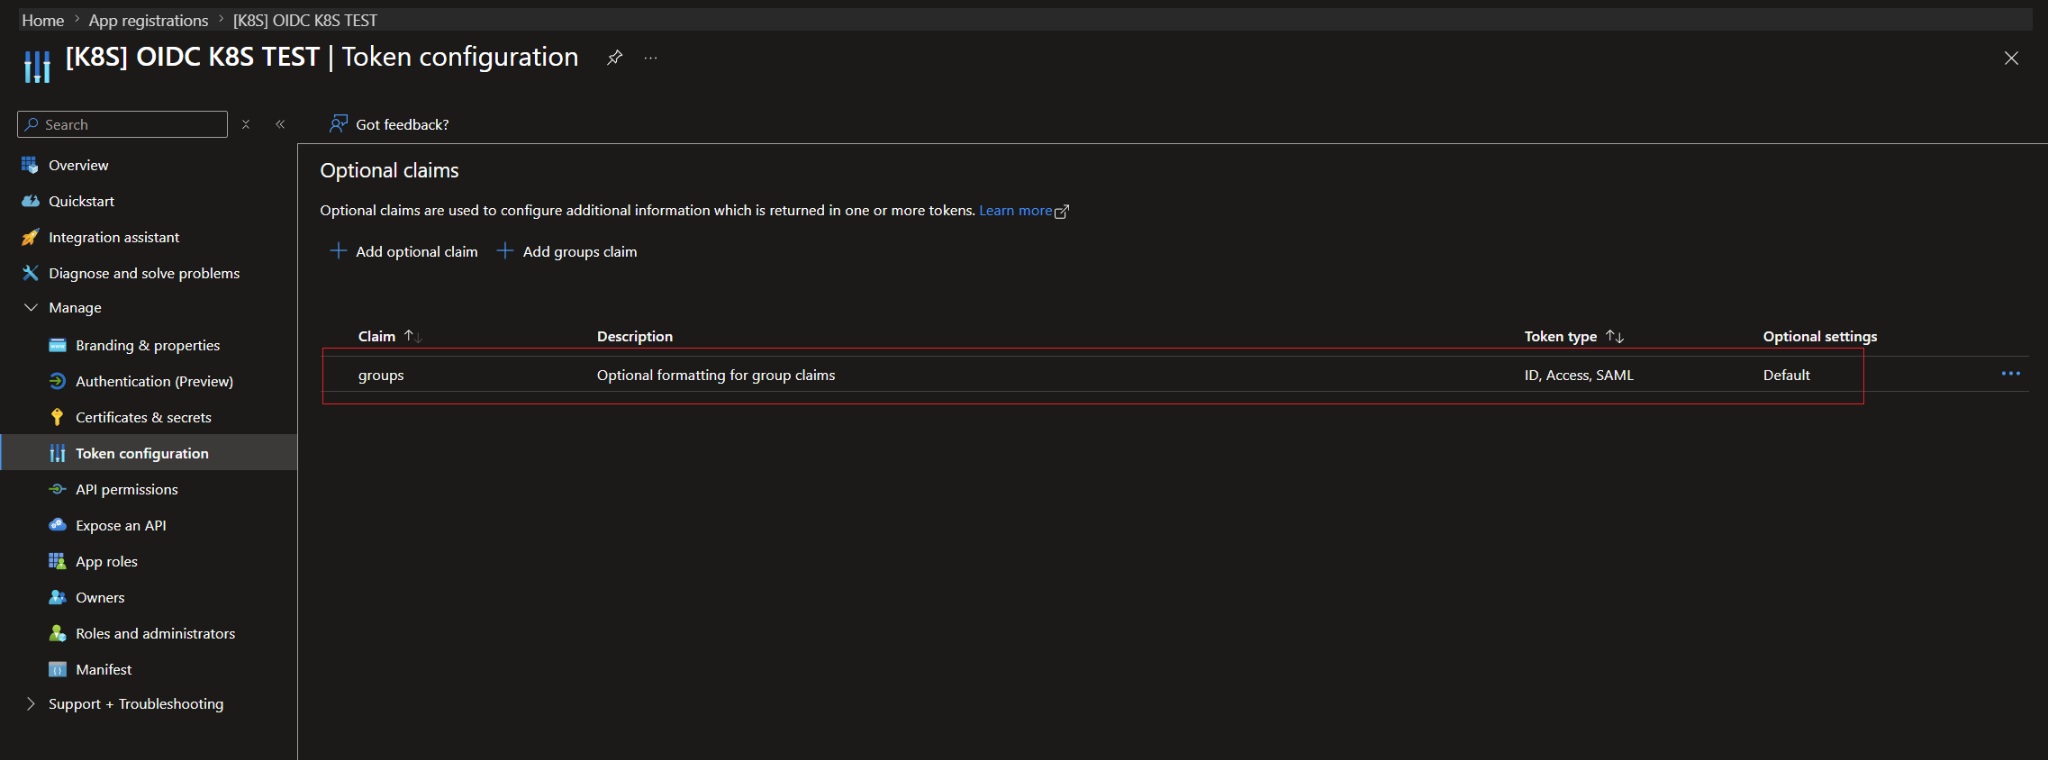
Next, go to Token configuration and configure the Group claim.
This step is very important: if you do not configure the Group Claim, the returned JWT token will not contain the user’s group list, and Kubernetes will not be able to authorize based on groups. Choose All groups and make sure you select Group ID (Object ID) so the token returns the exact value required by Kubernetes RBAC.
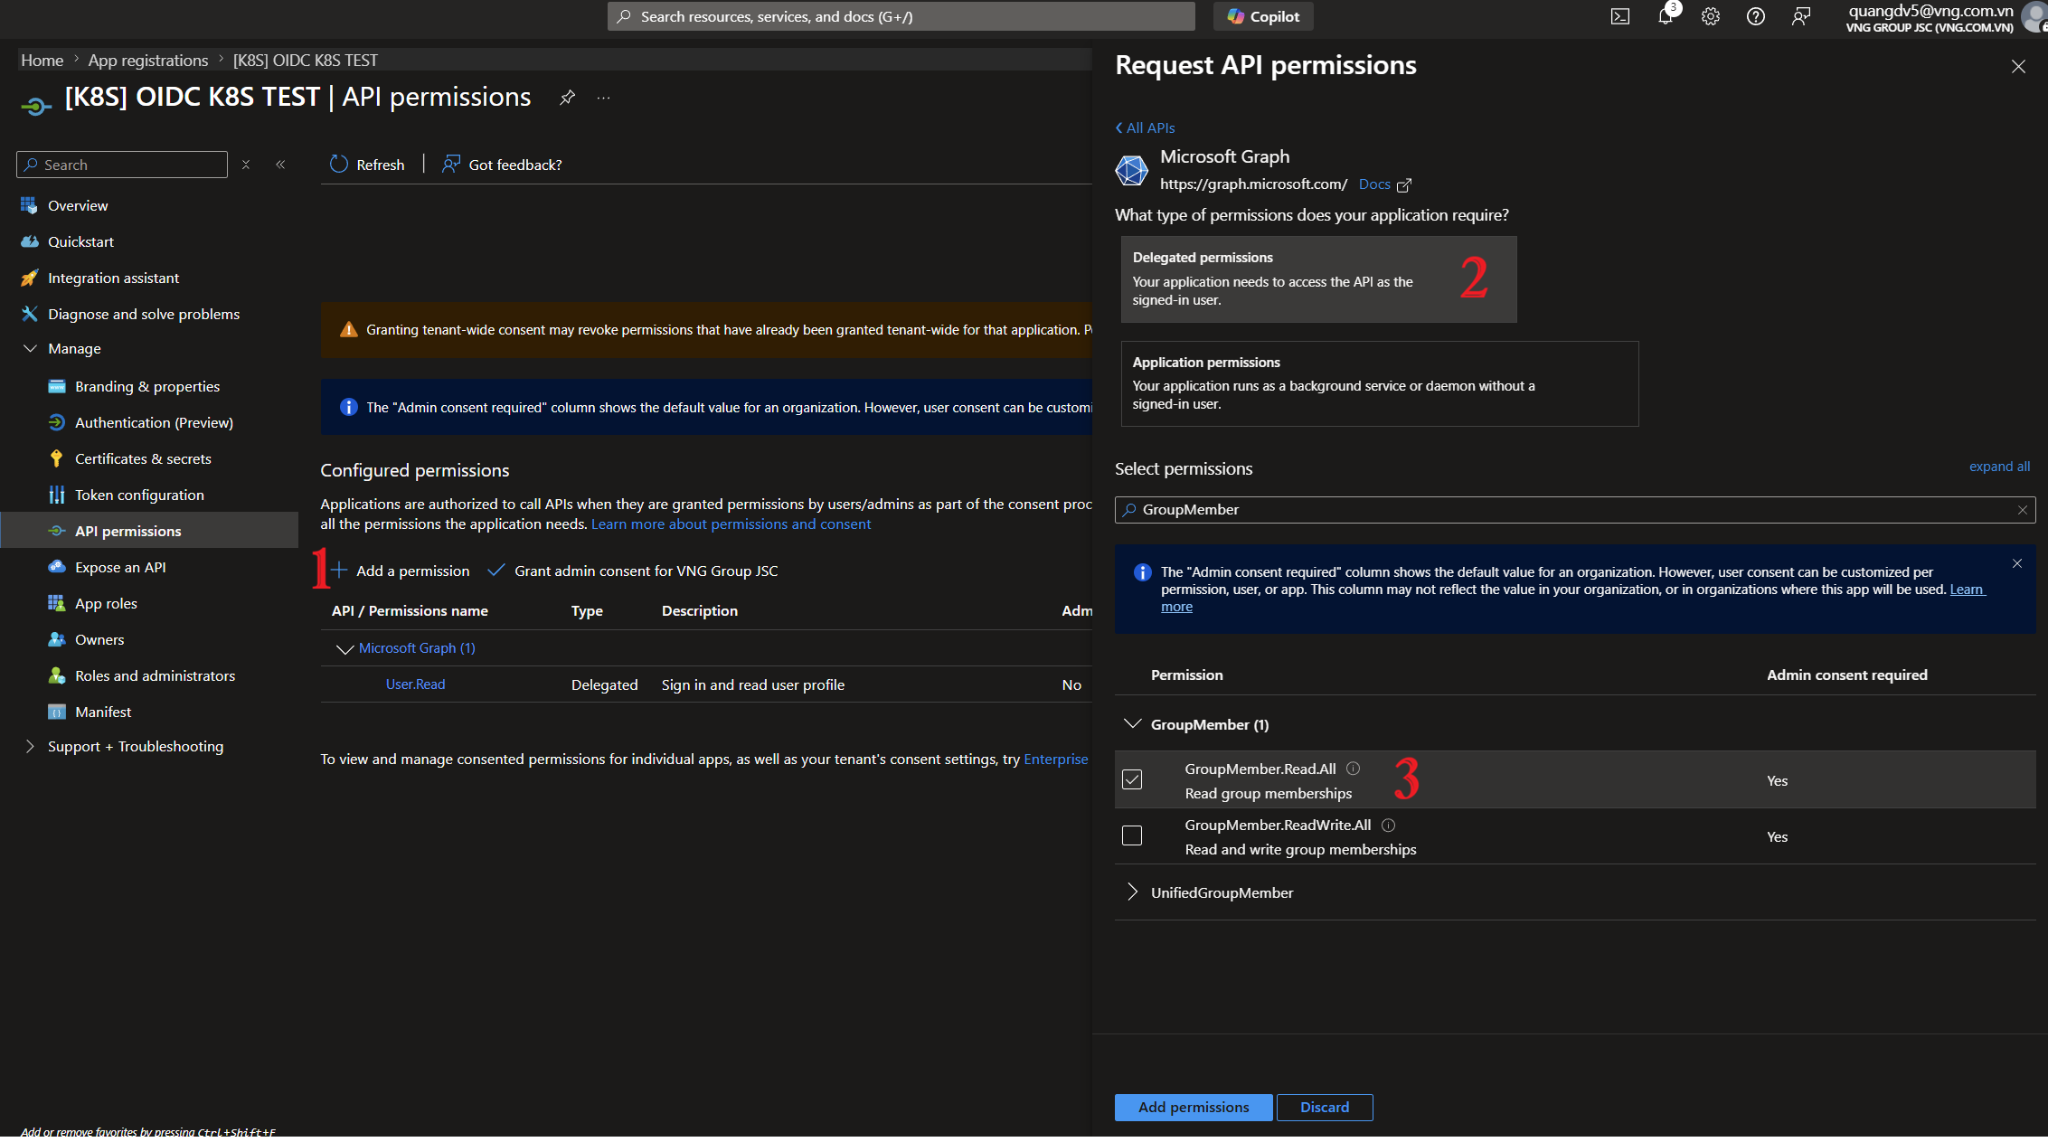
Then continue with API Permissions and add the GroupMember.Read.All permission.
Select Grant admin consent to grant API access.
Note: This step requires either the Global Administrator or Privileged Role Administrator role, or you can ask a Global Admin to grant consent for the application. If you forget to grant consent, the token will not contain group information and Kubernetes authorization will not work correctly. Make sure the Status column shows a green check mark after consent is granted.
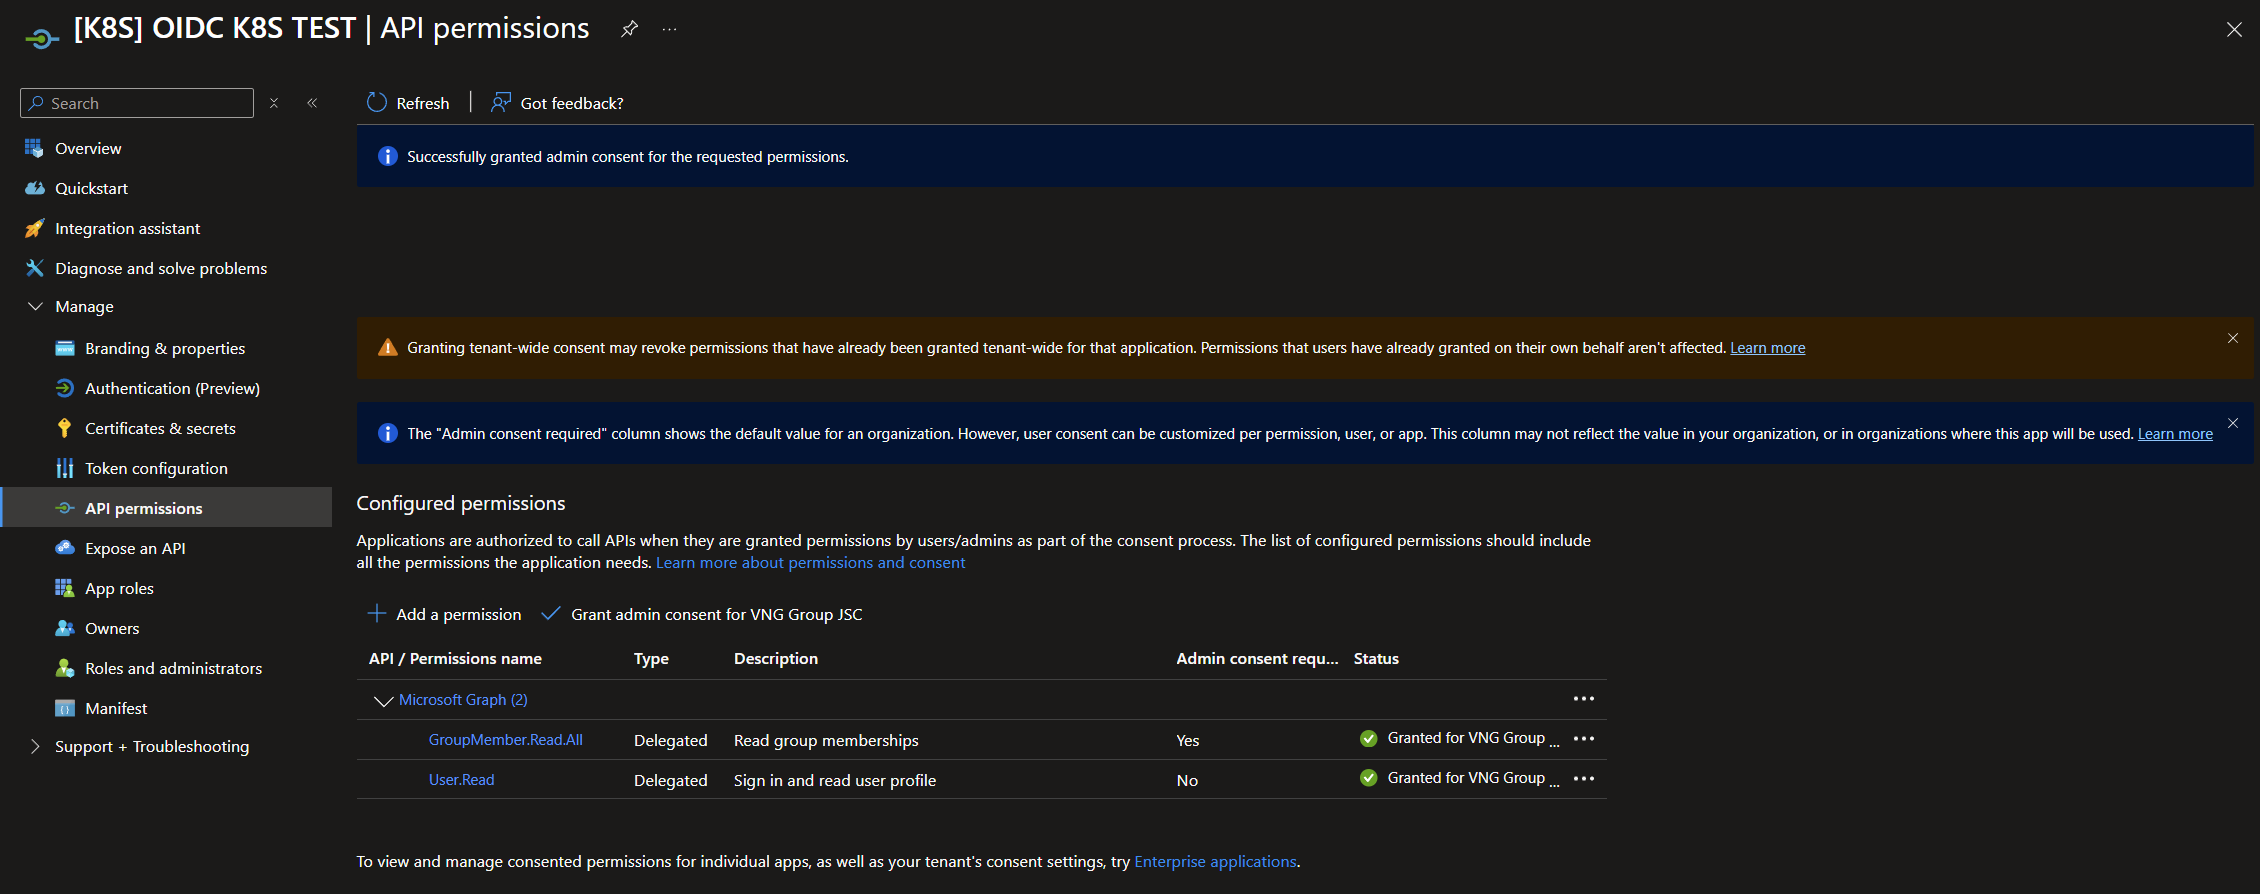
At this point, the application configuration on Azure is complete. Next, move on to configuring the Kubernetes kube-apiserver.
Configure kube-apiserver on Kubernetes
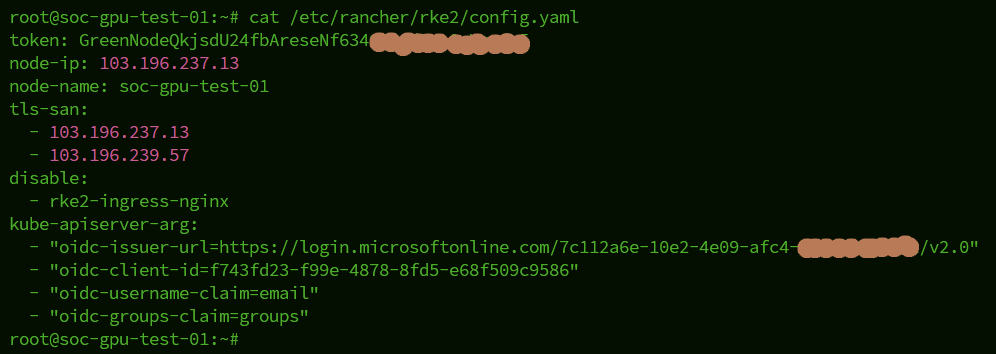
In this setup, the Kubernetes cluster was initialized using RKE2, so the configuration will be modified in /etc/rancher/rke2/config.yaml. If you used another method to initialize your cluster, the configuration file may be located elsewhere, so you should check accordingly.
Add the following configuration to the config.yaml file:
kube-apiserver-arg:
- "oidc-issuer-url=https://login.microsoftonline.com/<tenant_id>/v2.0"
- "oidc-client-id=<Application (client) ID>"
- "oidc-username-claim=email"
- "oidc-groups-claim=groups"
Meaning of each flag:
- oidc-issuer-url: The URL of your Azure AD tenant — the
kube-apiserveruses it to fetch the public key used to verify the token. - oidc-client-id: The Client ID of the App Registration you created in the previous step.
- oidc-username-claim: The field in the JWT used as the username in Kubernetes (using the email makes it easier to identify users).
- oidc-groups-claim: The field containing the user’s group list (it must match the Group Claim configured in Azure AD).
Here is an example of the config.yaml file.
Restart the RKE2 server with the command systemctl restart rke2-server.service.
Next, we will configure the client machine that will use kubectl to manage the Kubernetes cluster.
Configure the client machine
First, install the kubelogin package by following the instructions at https://github.com/int128/kubelogin
Create a kubeconfig file using the following template (by default, the file is located at ~/.kube/config):
apiVersion: v1

clusters:
- cluster:
    certificate-authority-data: xxx
    server: https://IP:6443
  name: default

contexts:
- context:
    cluster: default
    user: oidc-user
  name: oidc-context

current-context: oidc-context
kind: Config
preferences: {}

users:
- name: oidc-user
  user:
    exec:
      apiVersion: client.authentication.k8s.io/v1
      command: kubectl
      interactiveMode: IfAvailable
      args:
      - oidc-login
      - get-token
      - --oidc-issuer-url=https://login.microsoftonline.com/<tenant_id>/v2.0
      - --oidc-client-id=<Application (client) ID>
      - --oidc-extra-scope=profile,email,openid
Try running a kubectl command to test it.

When you run the command, the browser will open a popup at http://localhost:8000 so you can log in with your O365 account.
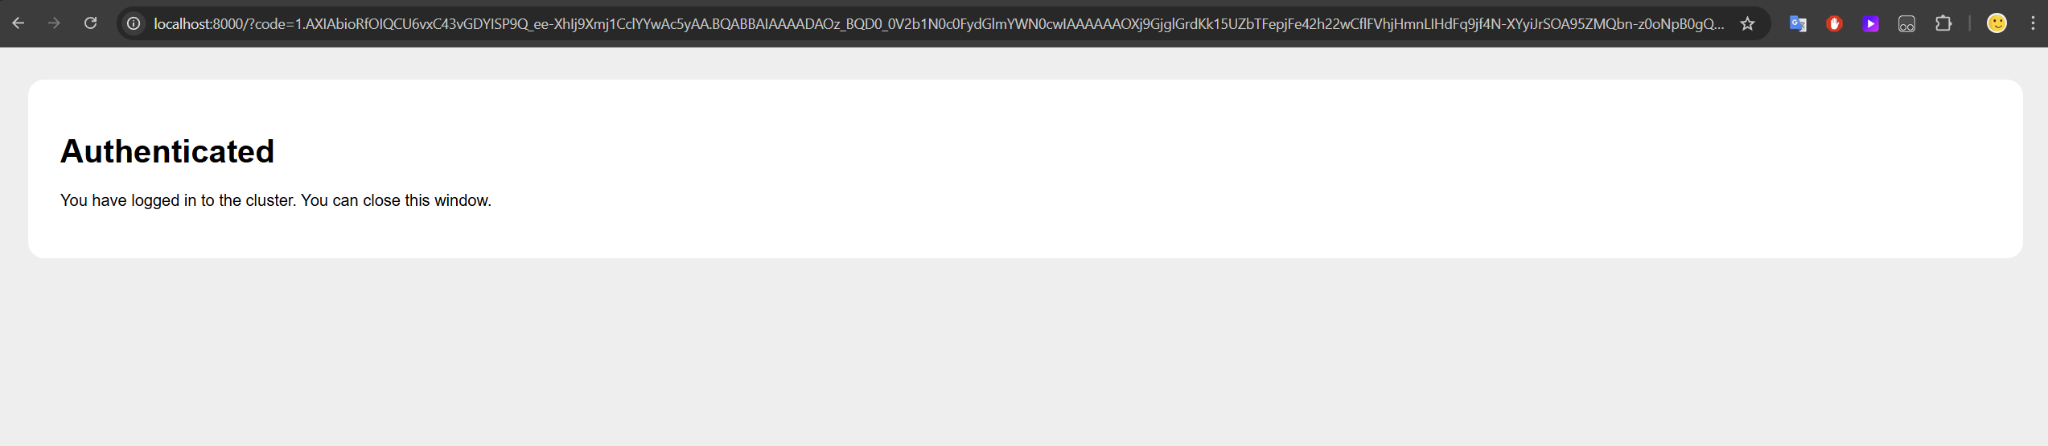
After logging in, kubectl will already retrieve the username and groups, but because we have not yet granted permissions to the user or group, the response will be Forbidden.
This is actually a good sign! A Forbidden error means OIDC authentication has succeeded — Kubernetes has already extracted the username and groups from the Azure AD token. We only need to create a ClusterRoleBinding in the next step to finish the setup.
You can use this command to retrieve the token and inspect the returned values on jwt.io:
kubectl oidc-login get-token --oidc-issuer-url=https://login.microsoftonline.com/<tenant_id>/v2.0 --oidc-client-id=<Application (client) ID>Next, use Kubernetes RBAC to define what actions users or groups are allowed to perform on the cluster.
Authorization with Kubernetes RBAC
Instead of assigning permissions to individual users, the best practice is to assign permissions by group. When a new employee joins, you simply add them to an Azure AD group and they automatically get Kubernetes access — no need to create users manually. Likewise, when someone leaves the company or changes roles, disabling their account or moving them to another group in Azure immediately removes or changes their access.
In this demo, I will grant the group named OIDC-K8S-ADMIN the cluster-admin role on the Kubernetes cluster.
First, create the group in Office 365 or in the Azure AD Portal.
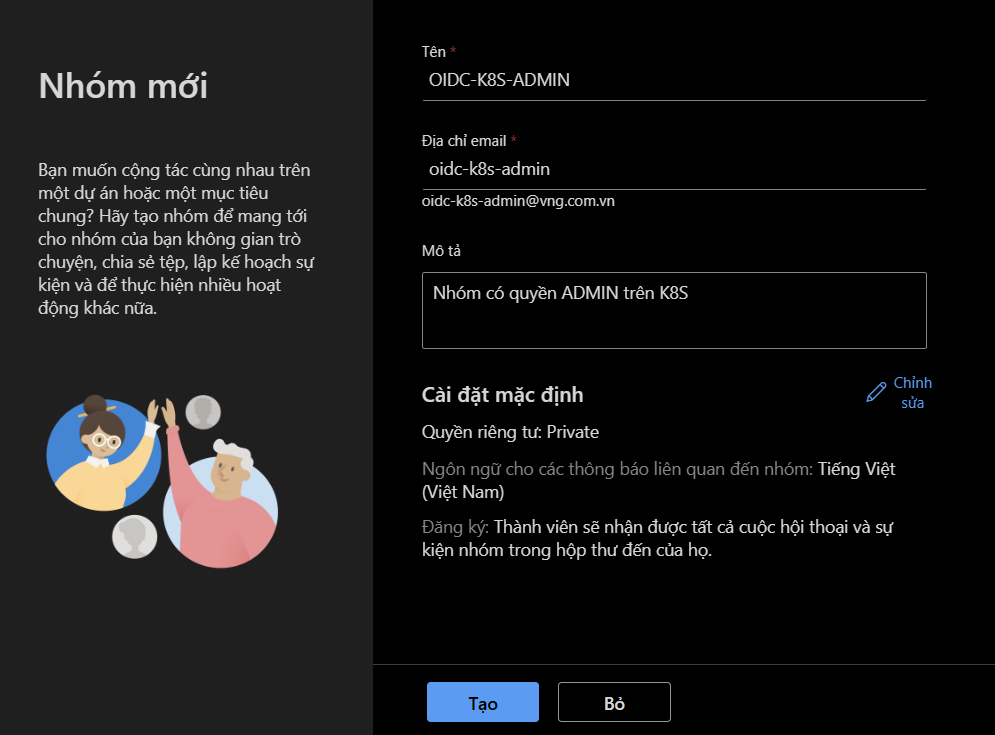
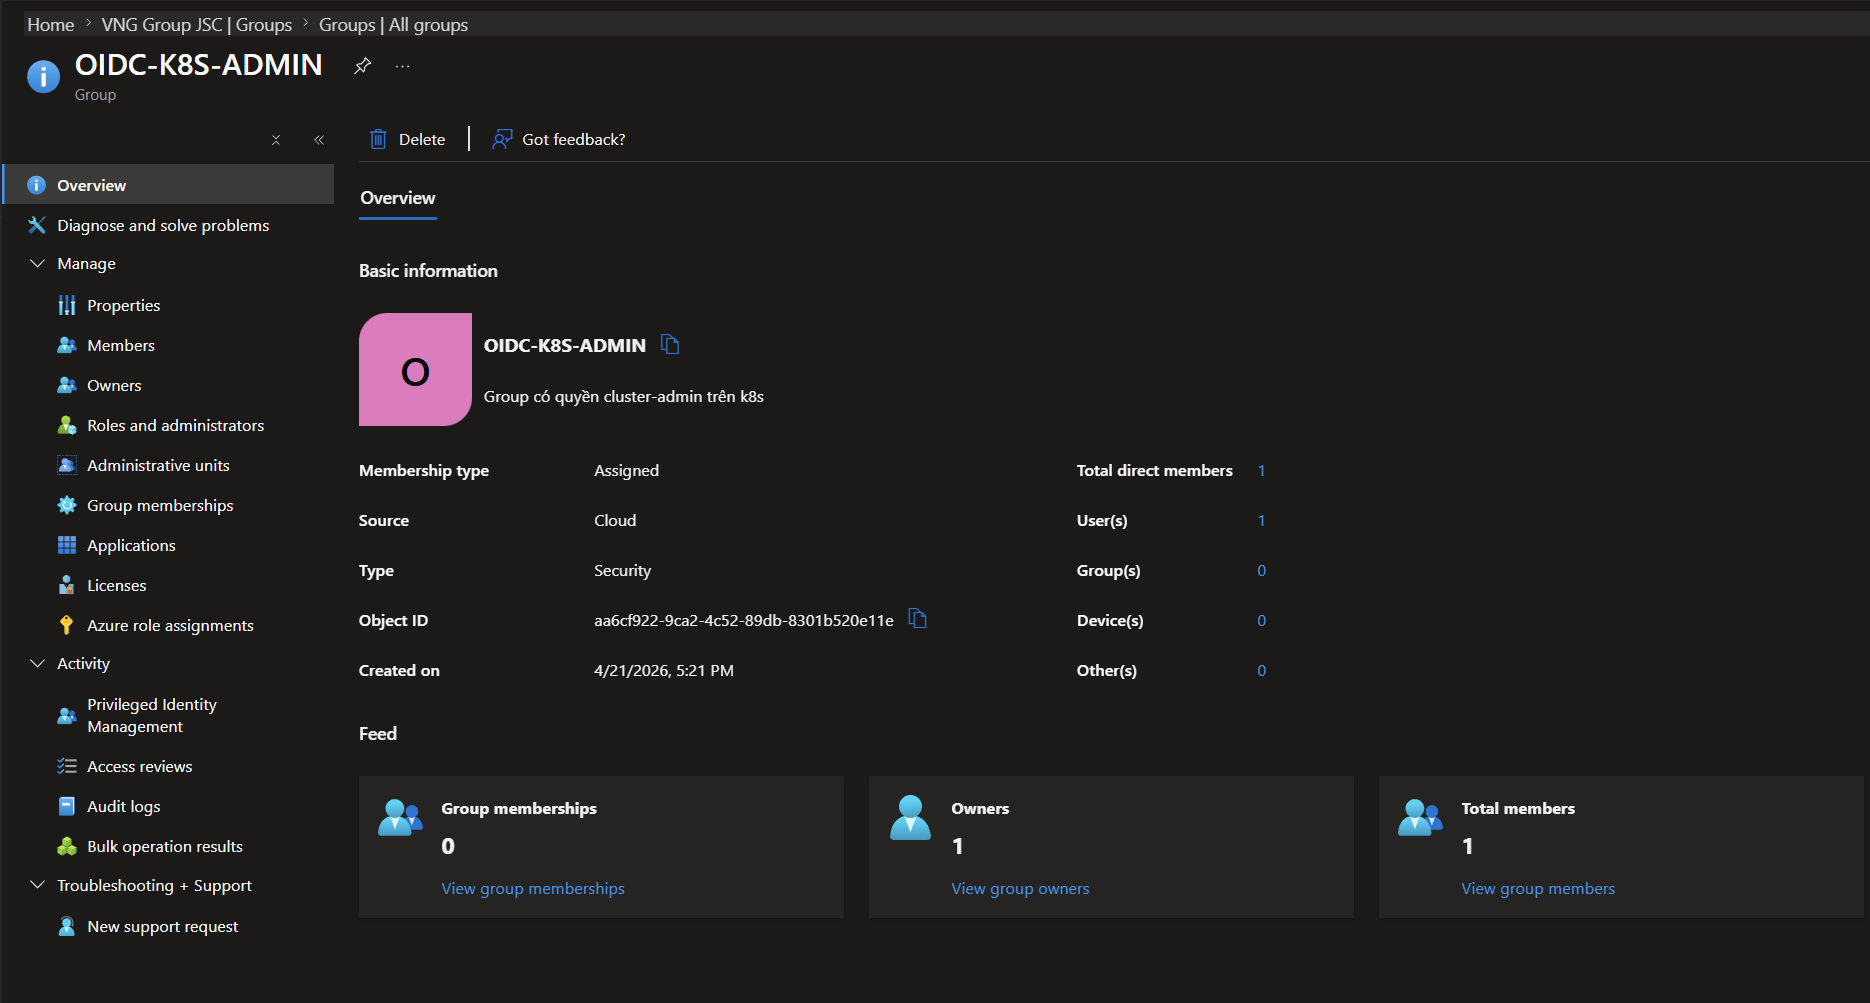
Pay attention to the group’s Object ID, because that is what we will use for authorization.
Note: Kubernetes uses the group’s Object ID (UUID), not its display name. Make sure you copy the correct Object ID when creating the ClusterRoleBinding in the next step.
Create a ClusterRoleBinding to grant permissions to the newly created group.
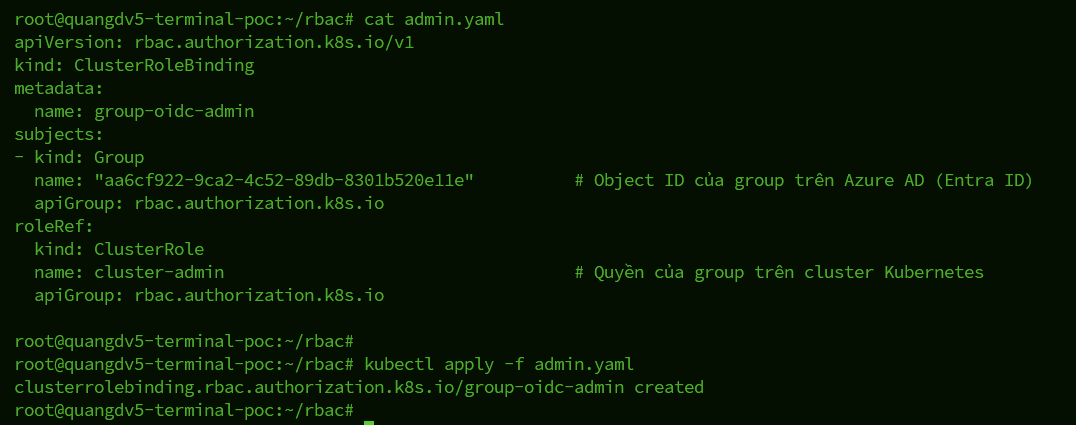
Now try running kubectl again on the client machine.
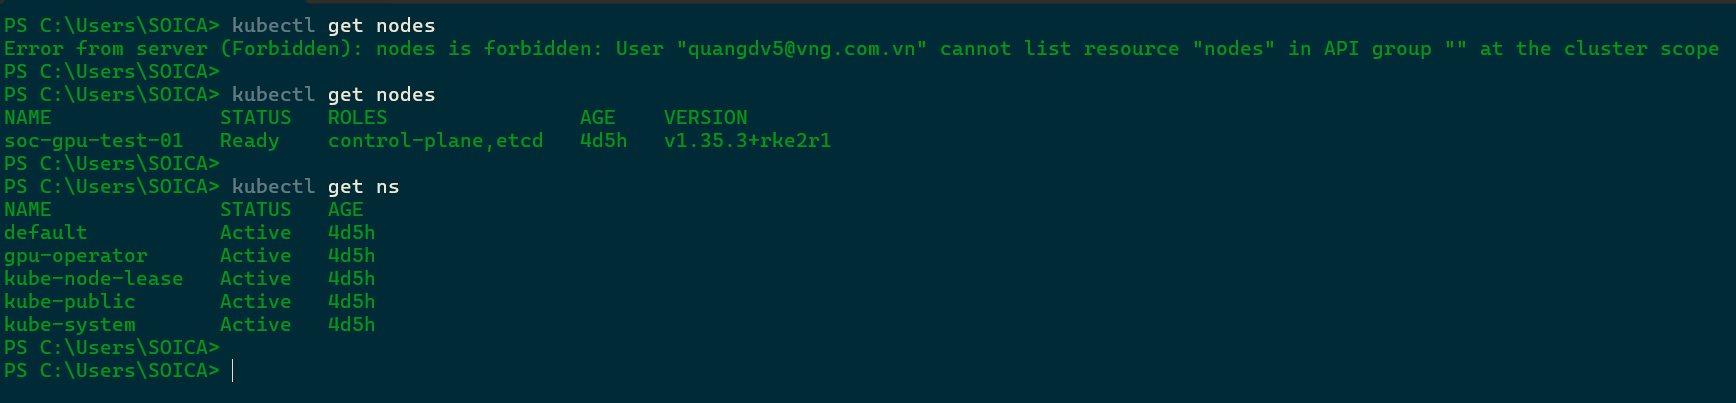
You should now be able to work with the Kubernetes cluster.
From this point on, whenever there are personnel changes, you only need to update the group membership in Azure rather than manually creating users or granting permissions directly inside the Kubernetes cluster.
Tip: To force a fresh login or generate a new token, delete the cache directory under $HOME/.kube/cache.
Conclusion
After completing the steps above, you will have built a Kubernetes access management system fully integrated with Azure AD. From here, the management workflow becomes very simple:
- New employee: Add them to an Azure AD group → they immediately get the corresponding access on Kubernetes.
- Employee leaves: Disable or delete the Azure AD account → all Kubernetes access is removed automatically, with no additional action required.
- Permission changes: Move the user between Azure AD groups → Kubernetes permissions change accordingly.
In companies that already use Azure AD (Entra ID), employee onboarding and offboarding are often automated through the HR system — so there is no longer a risk of forgetting to revoke Kubernetes access. Combined with a kubeconfig that does not hardcode credentials, this is what enterprise-grade Kubernetes access management should look like. In the next part, we will use an open-source Identity Provider for organizations that do not use Azure, or simply for those who want to run a private identity system.
See you~
