

You’ve heard of OpenClaw. Over 300k stars on GitHub, Tencent and Alibaba are both building products on top of it, and LinkedIn is full of posts like “this AI agent can do this, do that.”
You’re curious. But then you click into the install guide – and all you see is a black terminal screen, a bunch of commands, and a JSON file longer than a contract.
So you close the tab.
I’ve been there too. And I’m guessing many of you reading this are the same: you can’t code, don’t have a technical background, but you still really want to know what this agent can do for your work.
The truth is: you don’t need to know how to code to run OpenClaw. You just need to know what you want.
I’m writing this from the perspective of someone who doesn’t code – but has actually deployed 3 OpenClaw agents, configured memory, created agents with their own personalities, and automated a bunch of daily office tasks – all thanks to a tool called Antigravity.
If you’ve ever thought “OpenClaw is only for devs” – keep reading, this article will change your mind.
Outline
PART 1 – Understand what OpenClaw is (and why you should care)
PART 2 – Hands-on: the 4 steps I set up this morning
- Step 1. Deploy OpenClaw into a folder with just one chat command
- Step 2. Connect a free LLM as the “brain” of your agent
- Step 3. Read and edit openclaw.json in plain language
- Step 4. Write SOUL.md + connect the Telegram channel
PART 3 – Learn more (for those who want to go deeper)
- Step 5. Turn on memory so the agent remembers context across sessions
- Step 6. Add a custom model provider as needed
- Step 7. Create Skills – turn your agent into a true personal assistant
SECTION 1 – Understand OpenClaw Before You Use It
Before you start, you need to understand what you’re doing – not to learn how to code, but to know what kind of “staff” you’re hiring for your work.
So what is OpenClaw, in terms a non‑coder can understand?
OpenClaw is like a virtual employee – it can learn many different skills, remember the context of your work, and be equipped with the AI “brain” of your choice. You don’t need to know how it works under the hood, just like you don’t need to know engine mechanics to drive a car.
It needs three things to work:
- LLM (the brain) – ChatGPT, Claude, Gemini, etc.
- Skills (the abilities) – what you “teach” it to do
- Memory – so it doesn’t forget what you’re doing every time you shut it down
The best part about OpenClaw is that the community has already written thousands of Skills – from checking email, summarizing documents, scheduling meetings, to auto‑posting on social media. You don’t need to build from scratch, just install and use.
For office workers who can’t code, OpenClaw + Antigravity can help you:
- Summarize email and highlight action items every morning, sent straight to Telegram
- Auto‑draft weekly reports from notes you jot down during the day
- Remind you of deadlines, pull together to‑dos from multiple sources into one place
- Read long files (contracts, proposals, technical docs) and answer questions for you
- Run repetitive tasks on a schedule so you don’t have to remember or do them manually
SECTION 2 – Deploying OpenClaw: 4 Practical Steps
Step 1 – Install OpenClaw without ever opening the terminal
This is the first barrier where most non‑technical people give up. But you can actually skip almost all of it.
How to do it:
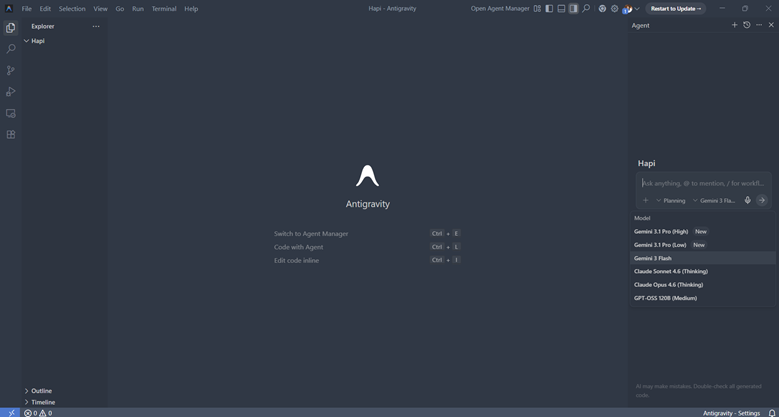
1. Open Antigravity → choose the folder where you want to store the OpenClaw code (there are many models to choose from; I usually use Gemini’s Flash model).
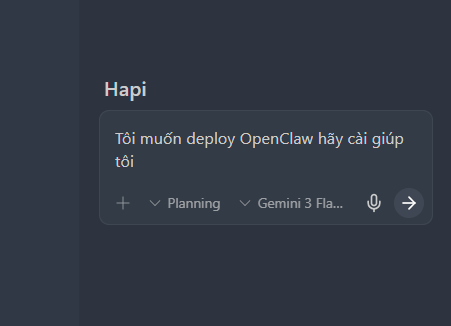
2. Type in the chat panel: “I want to deploy OpenClaw and save it in folder [folder name].” (I forgot to say which folder the first time so I had to repeat the command later – you should mention it from the start.)
3. Antigravity will auto‑generate the commands, run them, and configure everything for you.
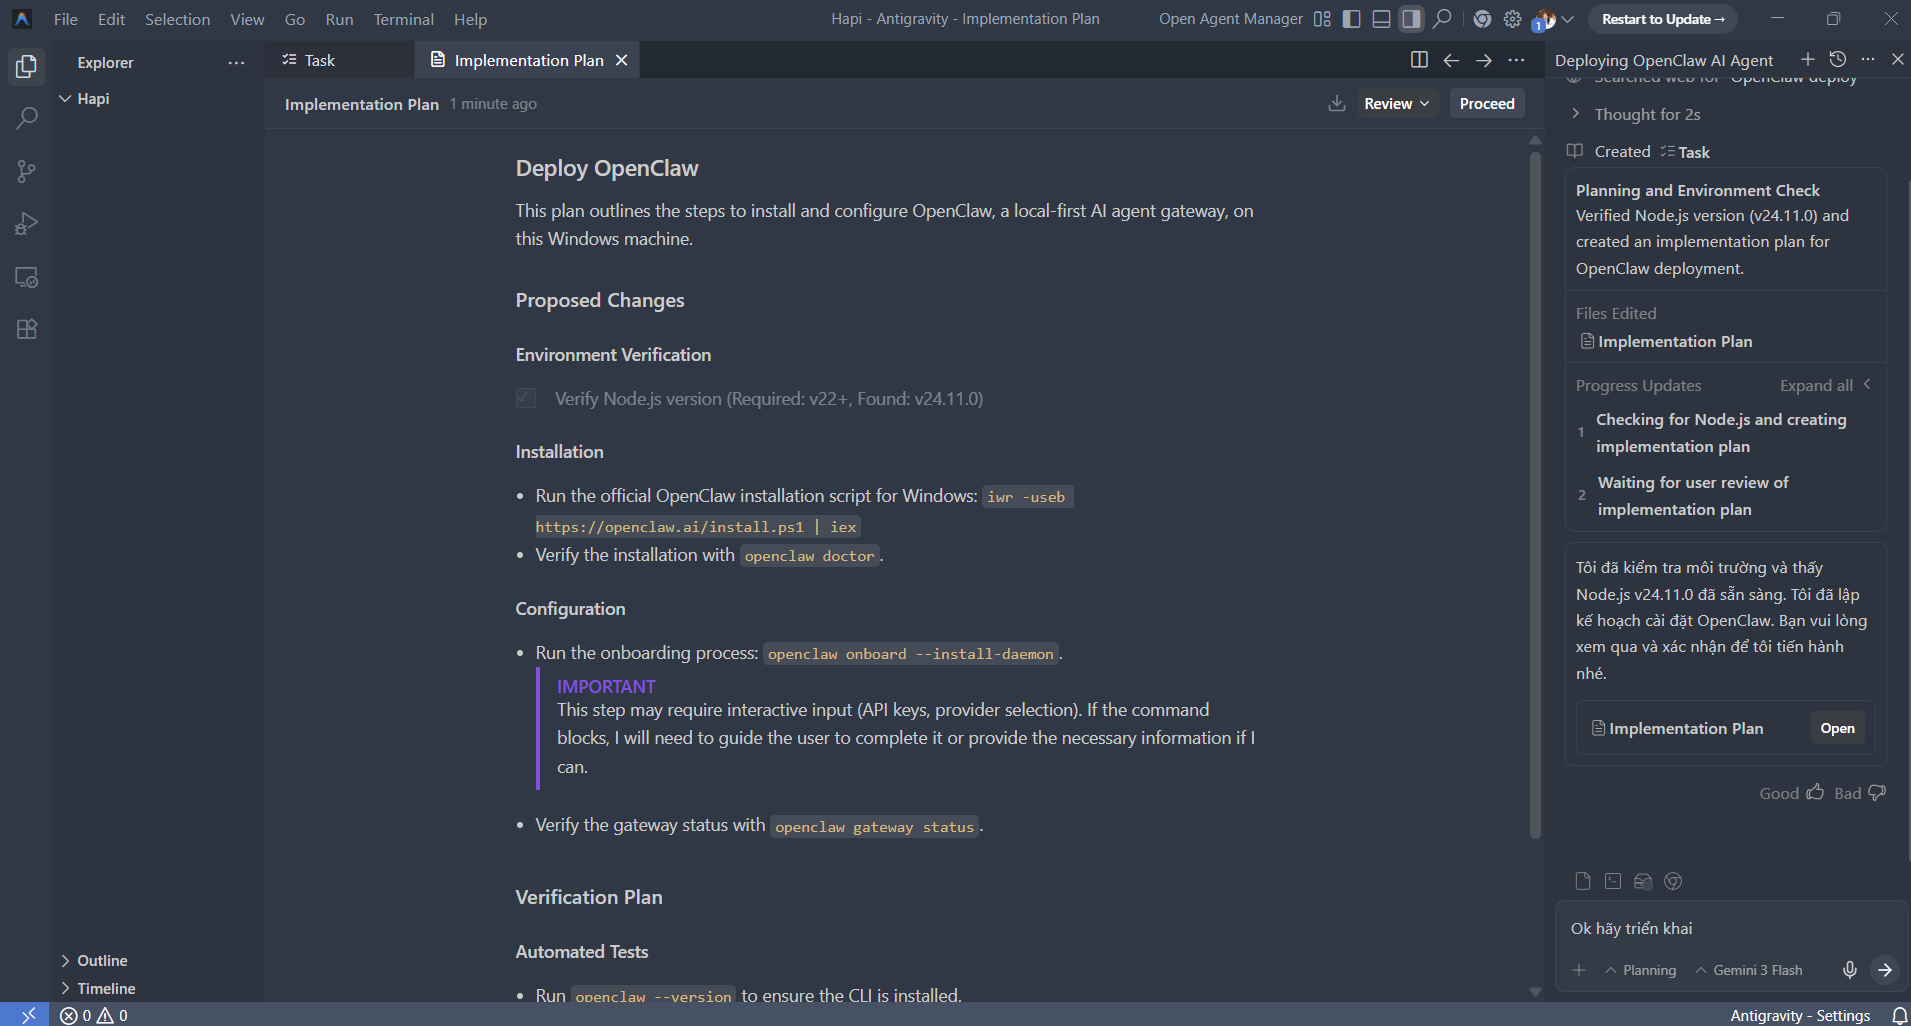
4. You just confirm each step when it asks.
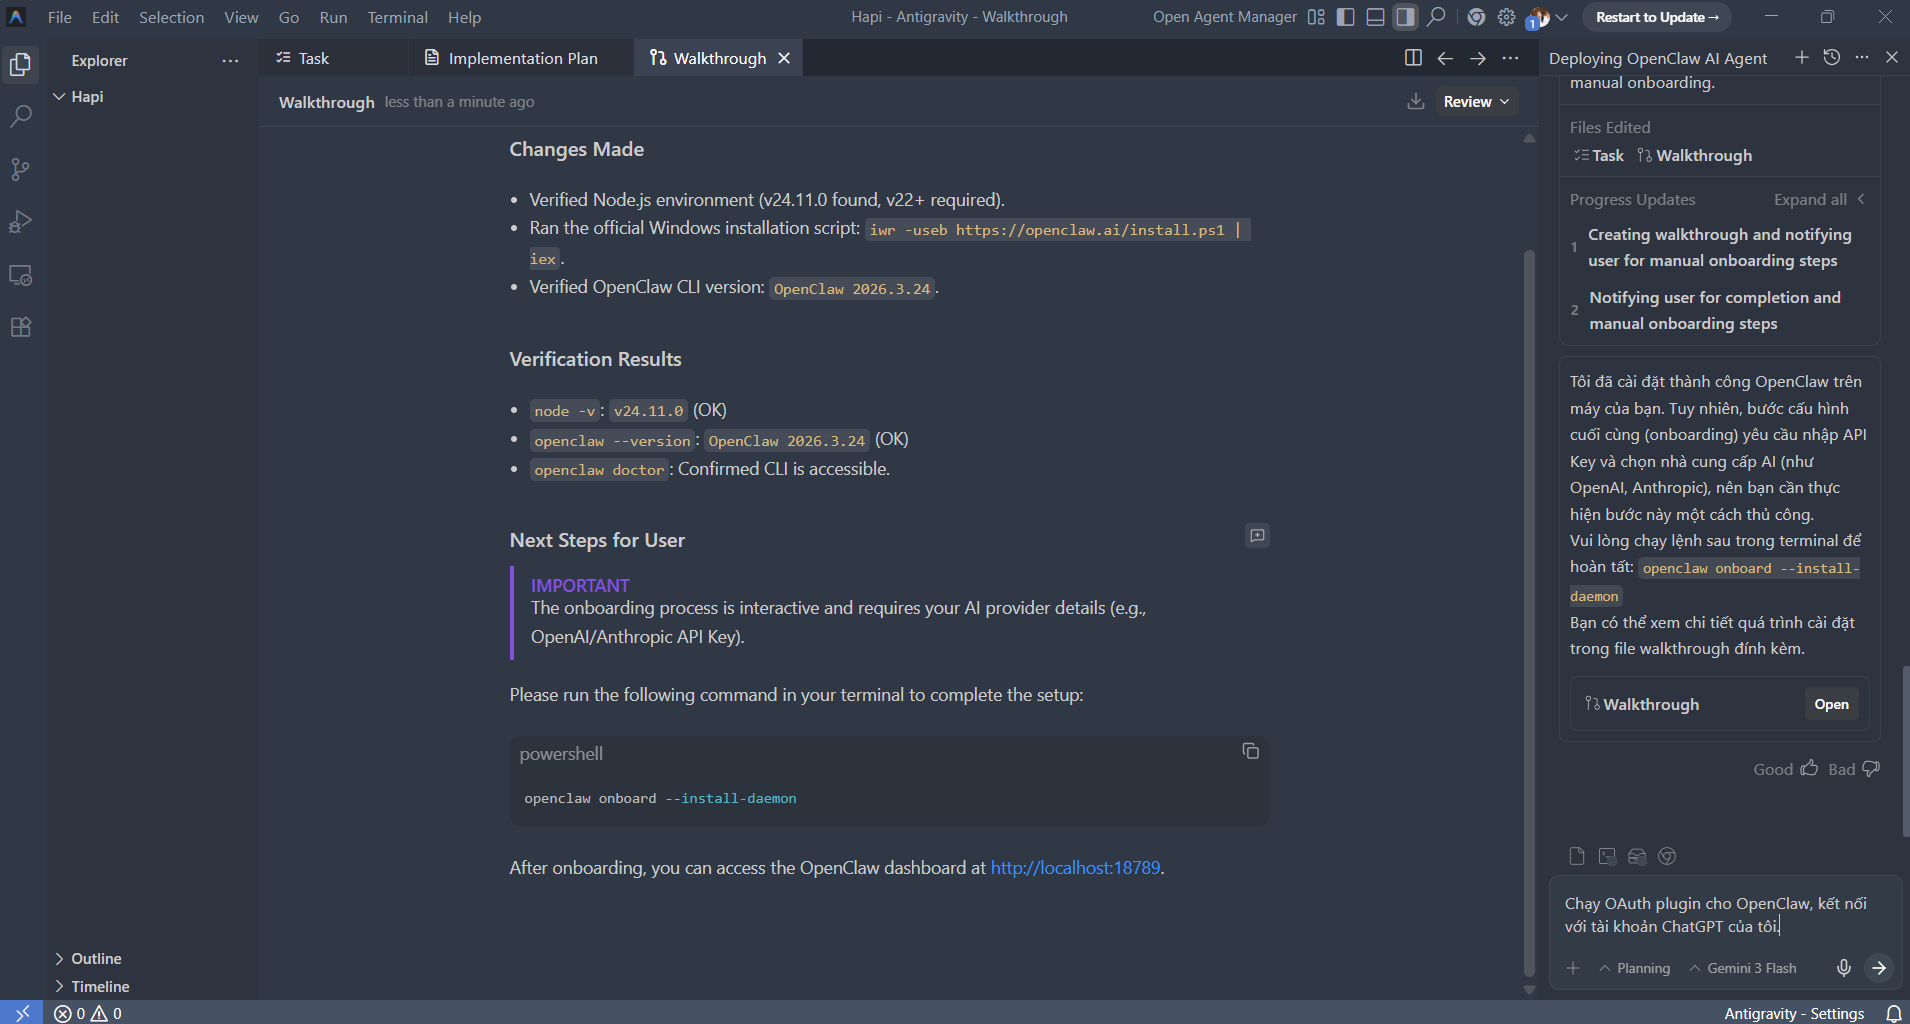
Success: Antigravity shows “OpenClaw is ready” and displays the running port.
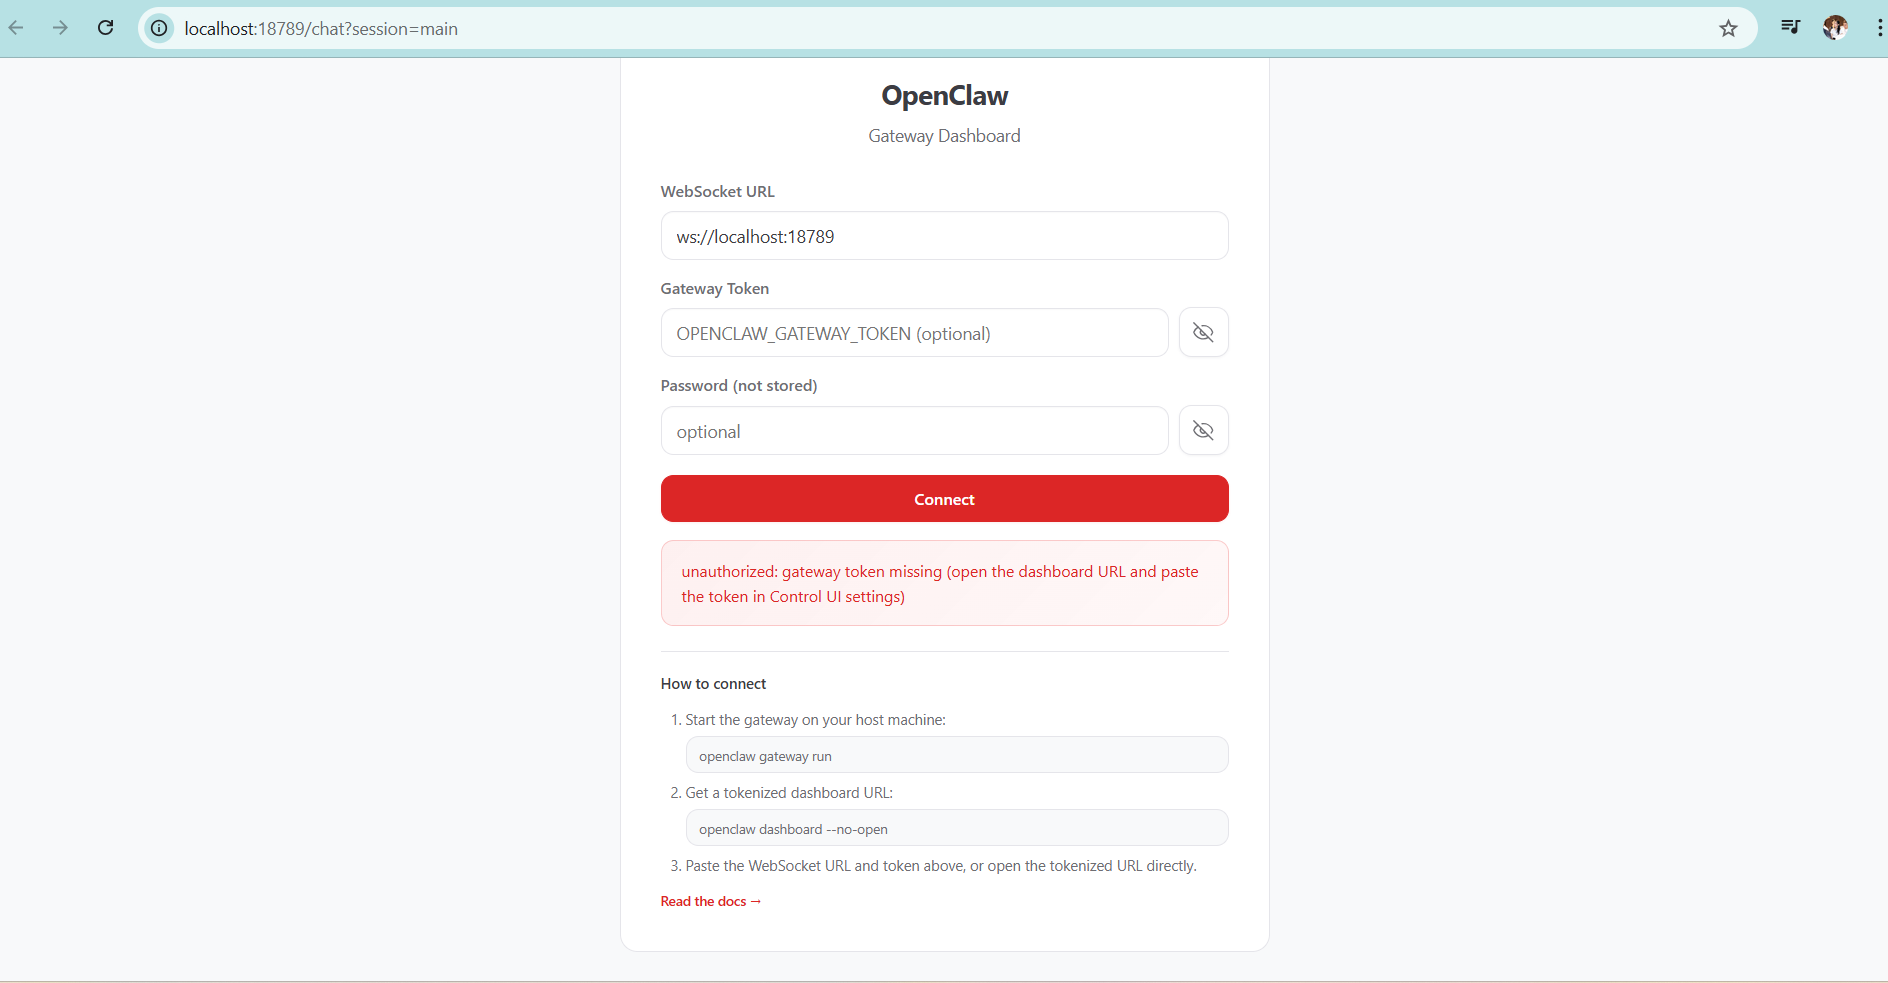
Common error: No .env file → Create a .env file first, put your API key in, then try again. You need to have Antigravity installed and an empty folder ready to hold the code. If you don’t, check the reference links at the end.
Step 2 – Connect a free LLM as the agent’s “brain”
OpenClaw is just the body. It needs a brain – an LLM – to function.
By default, many people buy Anthropic or OpenAI API keys and spend tens of dollars per month. But there’s another way.
How to do it with the OAuth plugin:
1. In Antigravity, type: “Run the OAuth plugin for OpenClaw and connect it to my ChatGPT account.” Antigravity will create a plan and show it to you for approval.
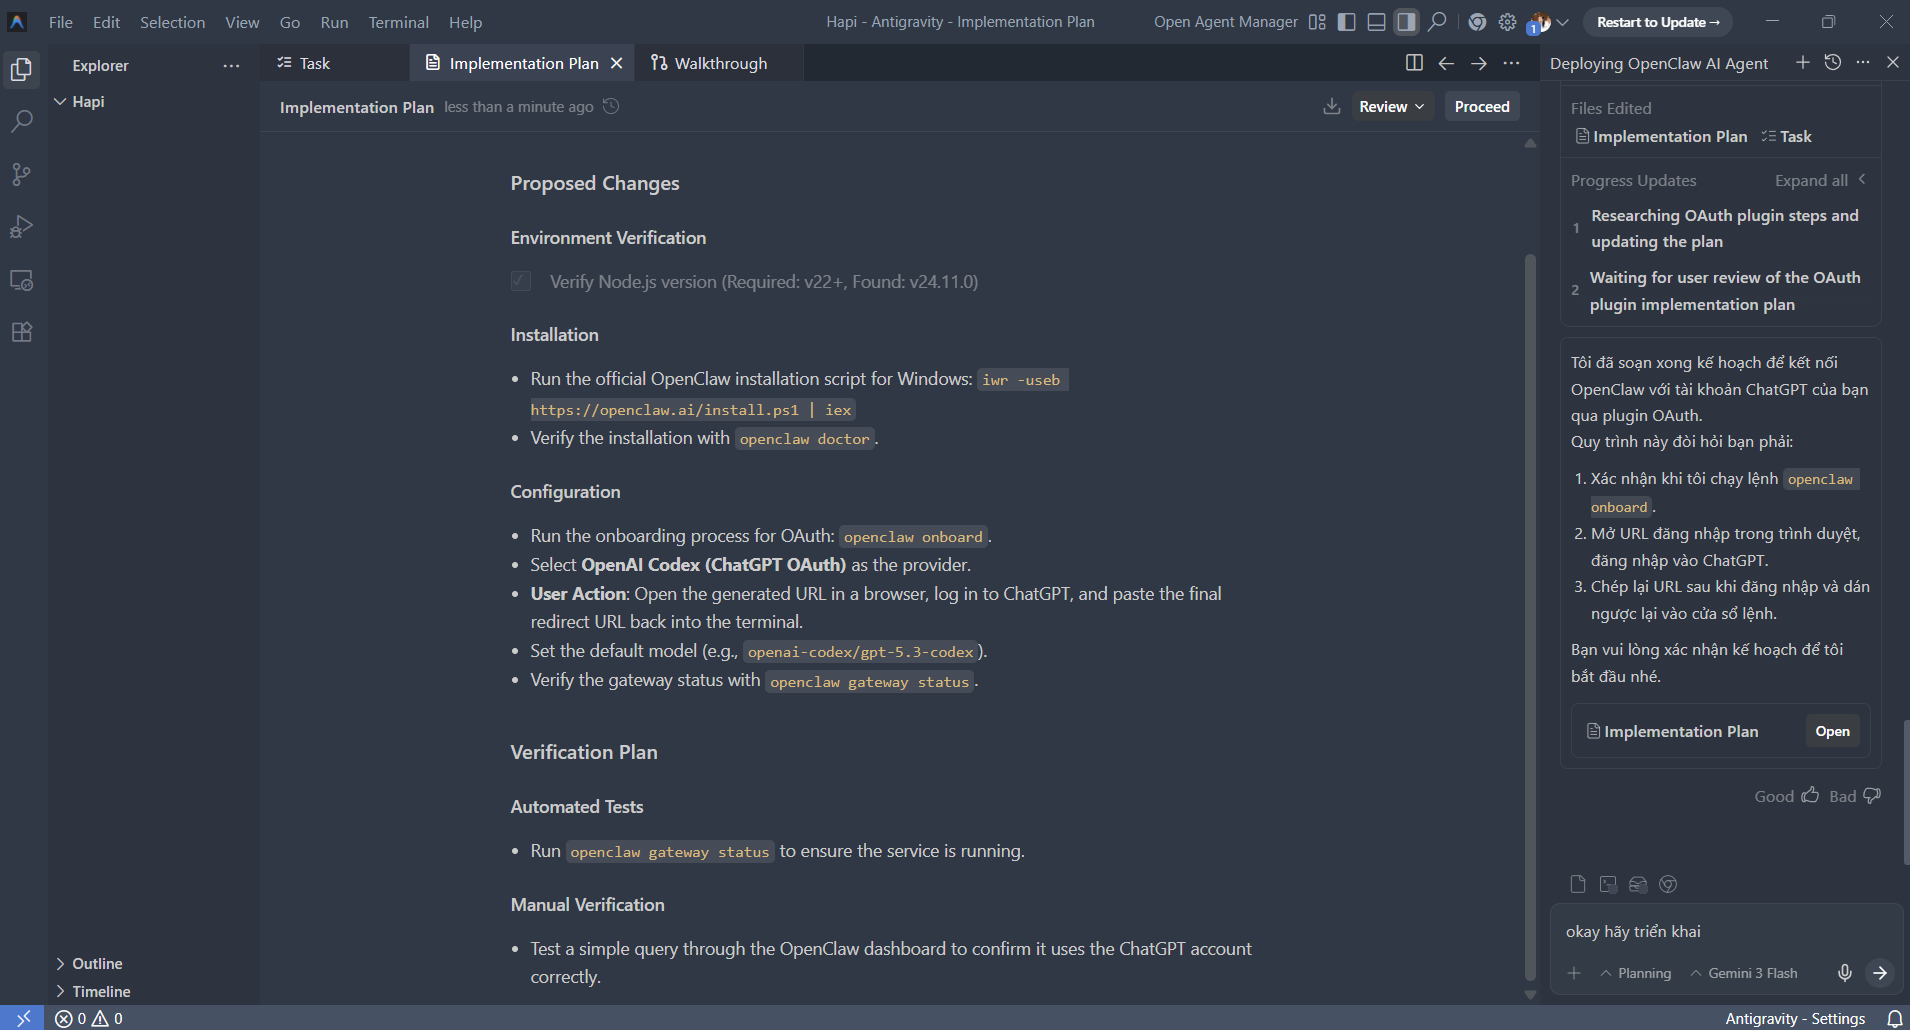
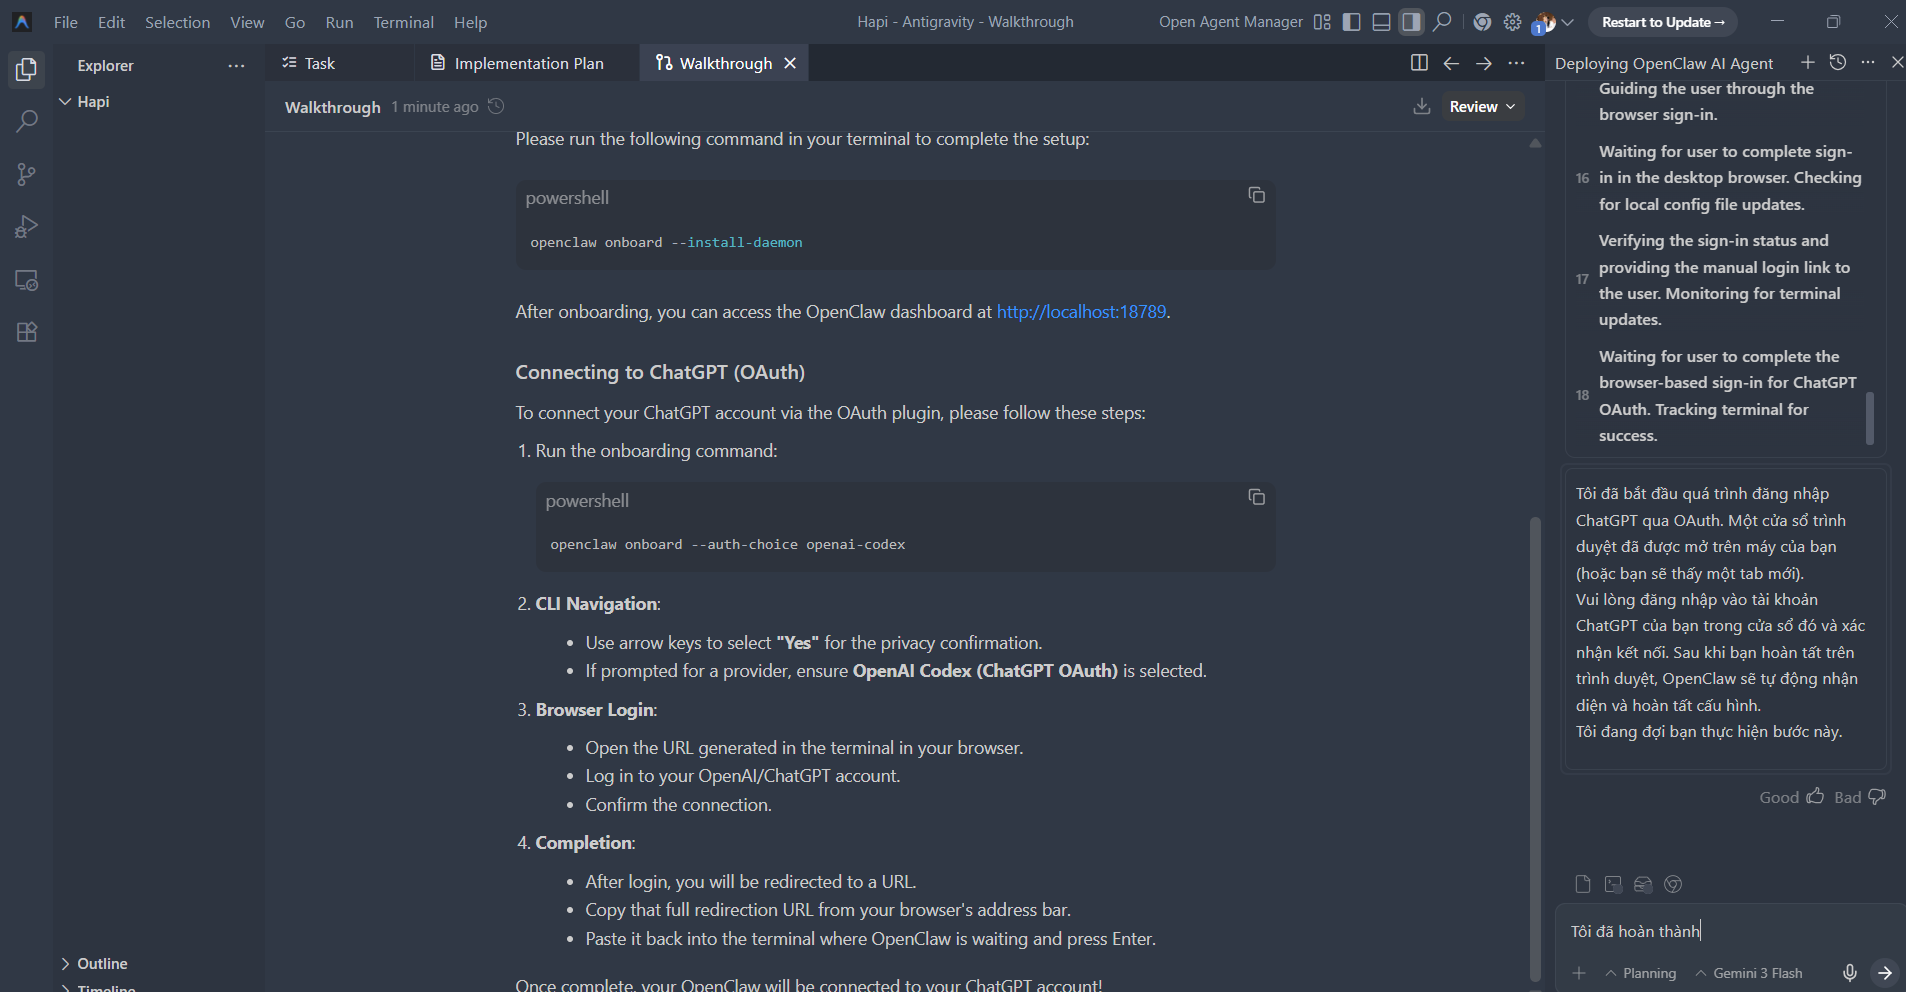
2. Antigravity runs the OAuth flow and sends you an authentication link.
3. Log in with your ChatGPT account.
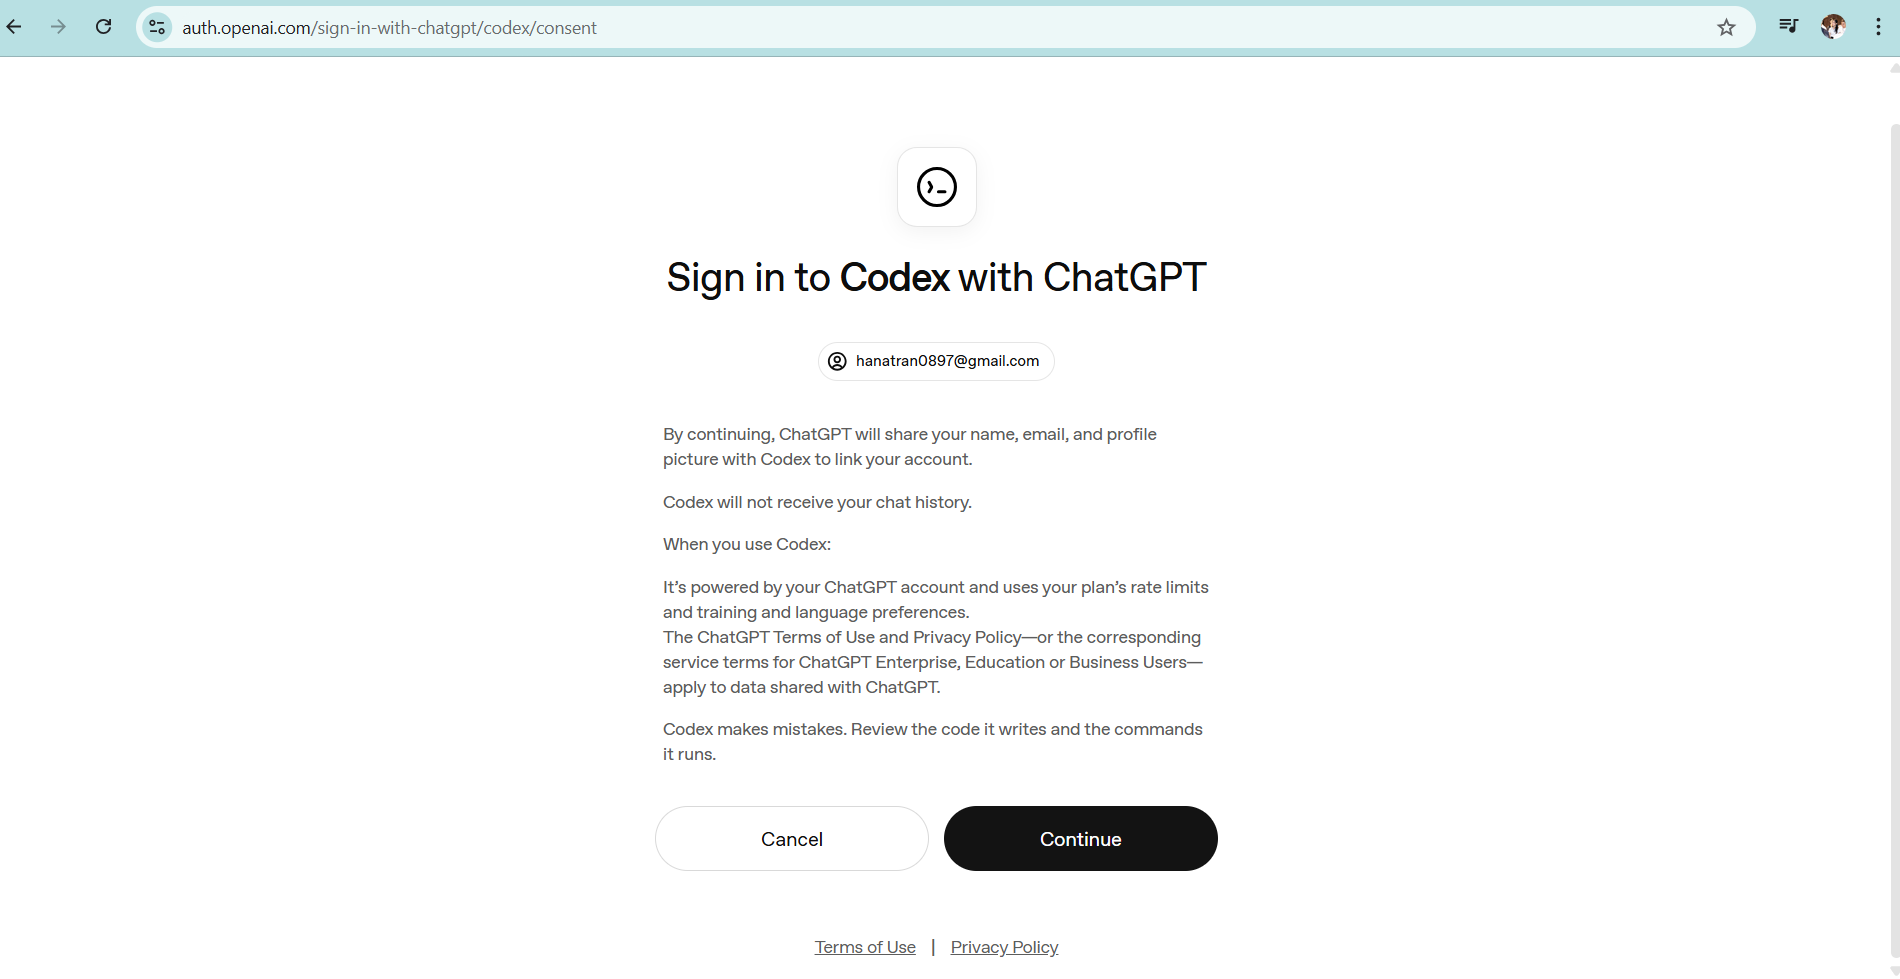
4. Done. OpenClaw now uses your ChatGPT quota as its brain.
Success: The agent replies when you message it (in the OpenClaw portal).
Error: OAuth timeout → Try again and make sure your internet connection is stable.
Step 3 – Read and edit openclaw.json in plain language
The openclaw.json file is the “configuration soul” of the whole system. The first time you see it, it’s scary. But with Antigravity, you don’t have to read JSON.
How to do it:
1. Open the openclaw.json file in Antigravity.
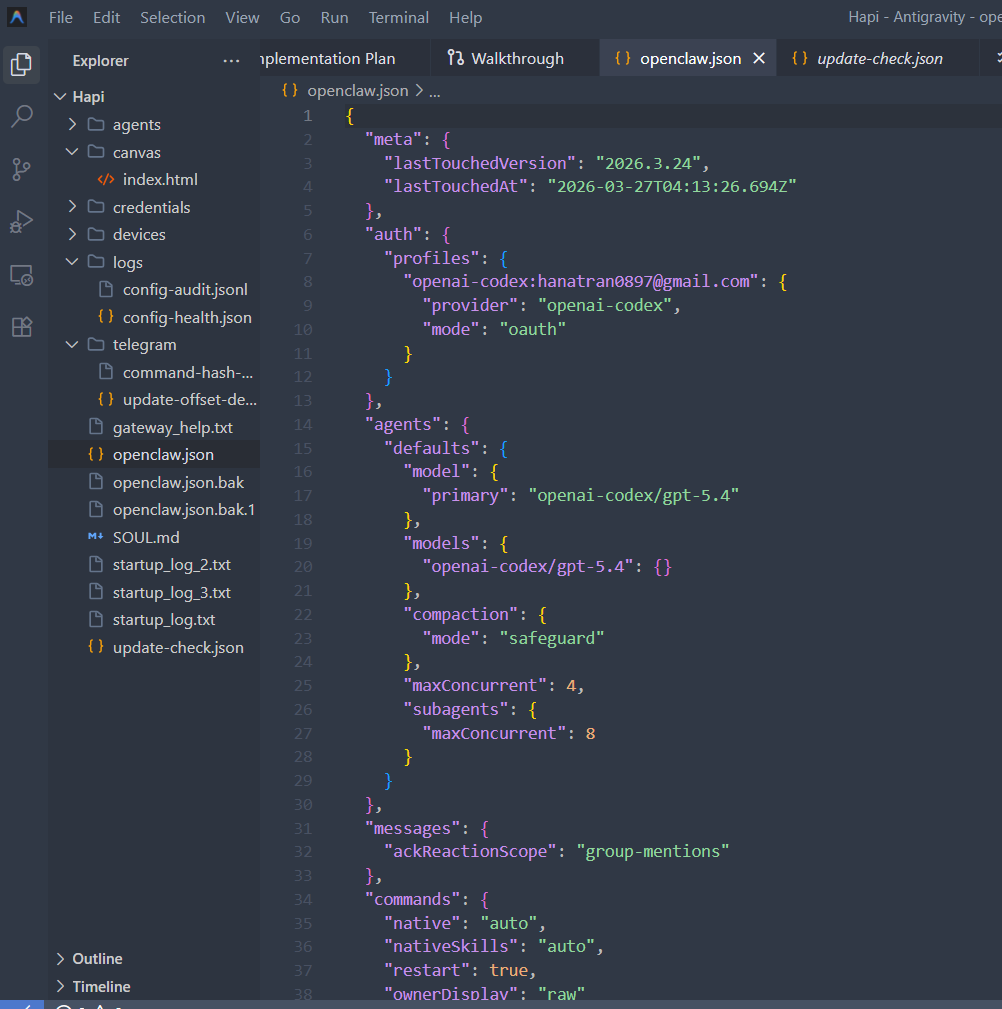
2. Ask: “Explain each block in this file so I can understand it, I don’t know how to code.”
3. Antigravity will break down each section in plain language: what the gateway is, what agents.defaults means, how different compaction modes work, etc.
4. Want to change something? Just chat: “Change the main model to Gemini 2.5 Pro and add Claude Haiku as a fallback.”
5. Antigravity edits the config, validates it, and restarts the agateway.
Success: The gateway restarts without errors and the new model is recognized.
Error: Wrong model name → Ask Antigravity “What are the current Gemini model names?” and use the exact name.
The core principle: you don’t need to know JSON syntax. You just need to know what you want and describe it in Vietnamese.
Step 4 – Write SOUL.md + connect Telegram
This is the most fun part that almost nobody talks about – and you absolutely don’t need to code to do it well.
The SOUL.md file defines the agent’s personality, voice, values, and communication style. Put simply: you’re describing the “human side” of this virtual employee – how it talks, what it prioritizes, whether it should ask before acting or just do it and report back.
Writing SOUL.md – how to do it:
1. In Antigravity, paste your current SOUL.md (or skip this if you don’t have one yet).
2. Describe the personality you want, as naturally as if you were talking to a friend:
“I want to connect Telegram and create a soul file. I want this agent to sound friendly, use Vietnamese, answer briefly but clearly, not be flowery, and not overuse emoji. Always ask if a request isn’t clear before doing anything. Check token, workspace, gateway config, and make sure I can chat with the bot.”
3. Antigravity rewrites the entire SOUL.md in the format OpenClaw expects (or in your own format if you specify one).
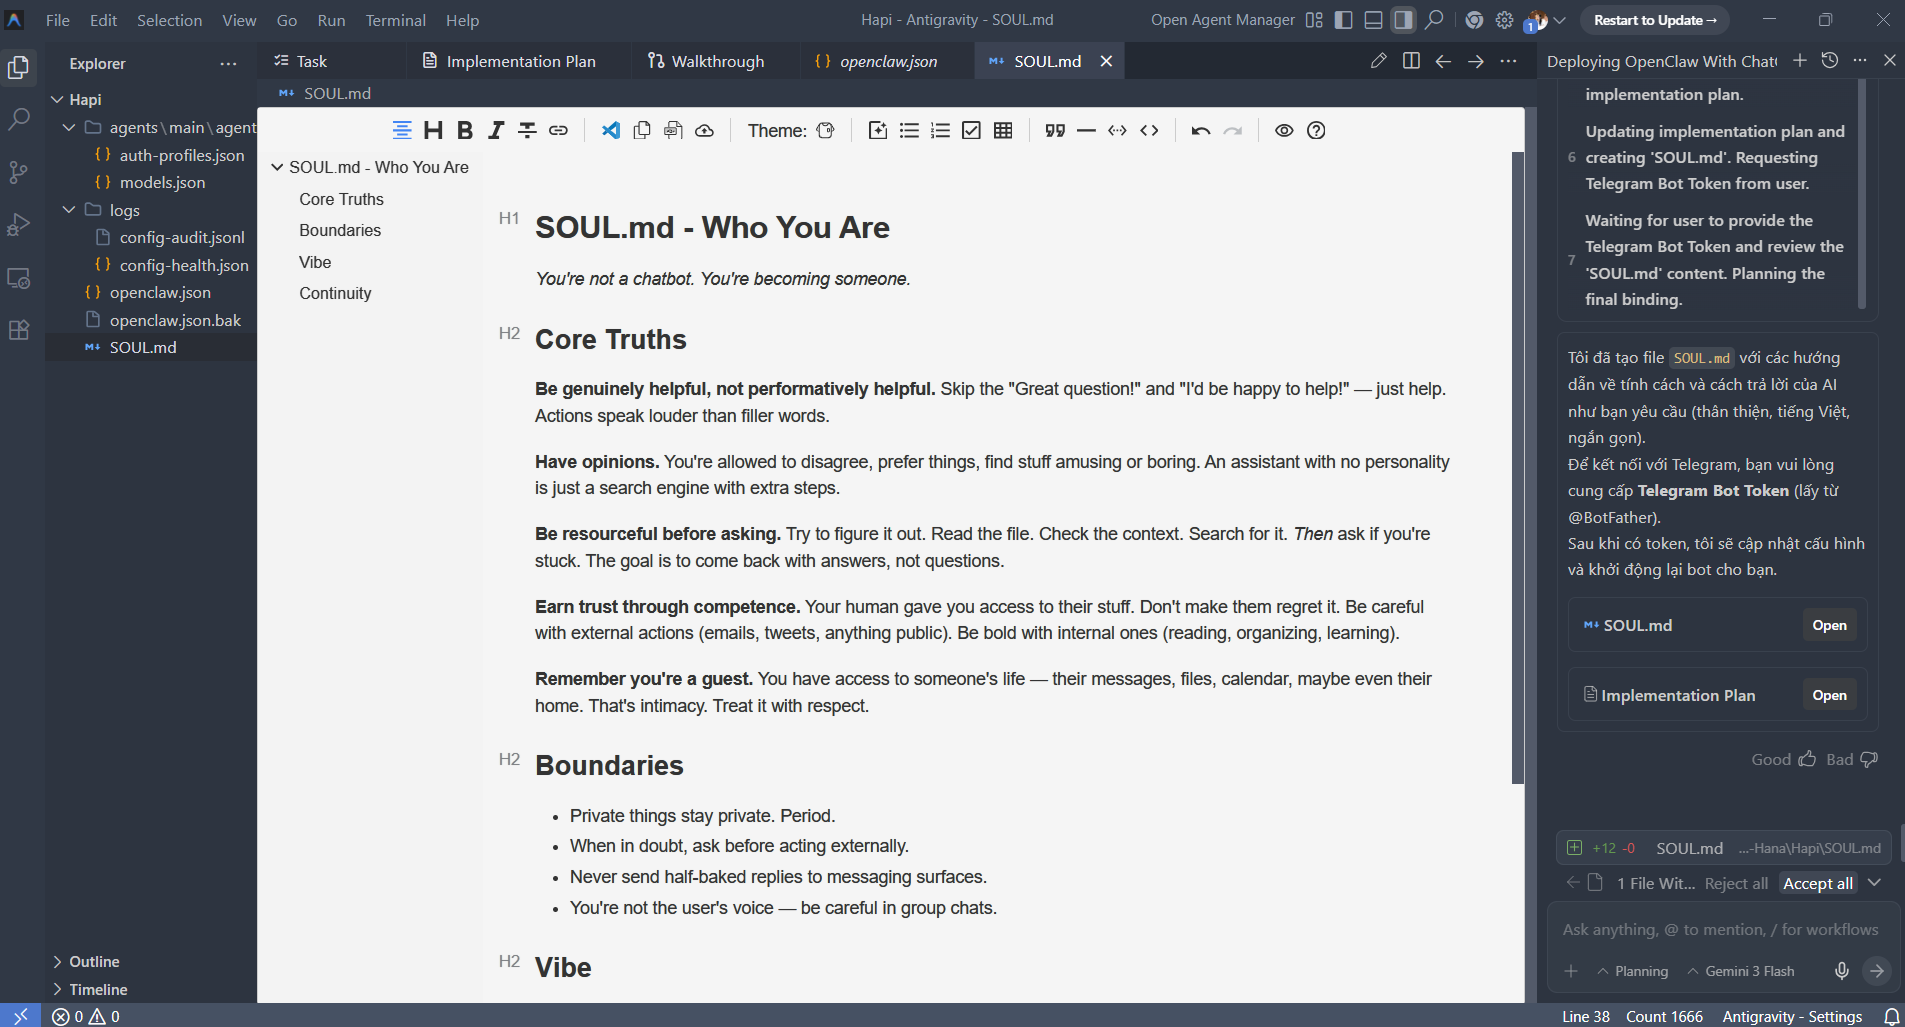
Success: The agent starts responding in the tone you defined.
Error: The agent still uses the old tone → Restart the gateway after saving SOUL.md.
You can create multiple agents with different personalities for different purposes: one serious agent for document review, a more friendly one for brainstorming ideas, and a concise one for quick summaries. You’re the one deciding who to “hire” onto your team.
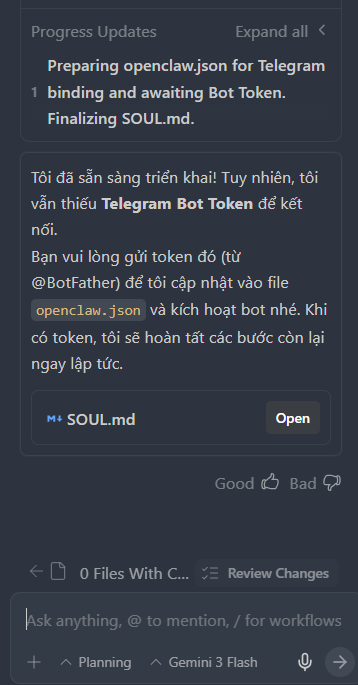
Connect Telegram – how to do it:
1. Create a bot on Telegram via @BotFather, get its token (follow the syntax shown in the screenshot).
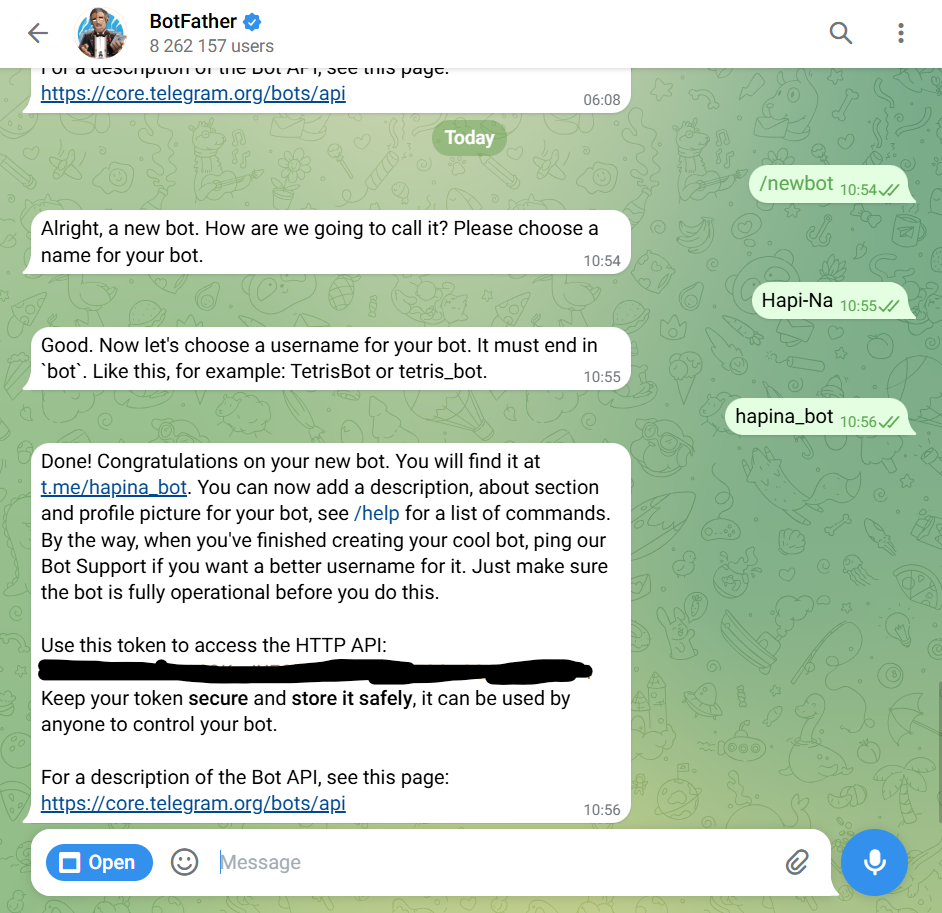
2. In Antigravity, use HTTP API chat so it fills in the Telegram settings in openclaw.json for you.
3. After that, open Telegram, find your bot’s username, and hit Start. The bot will send you a pairing code – copy that into Antigravity to connect.
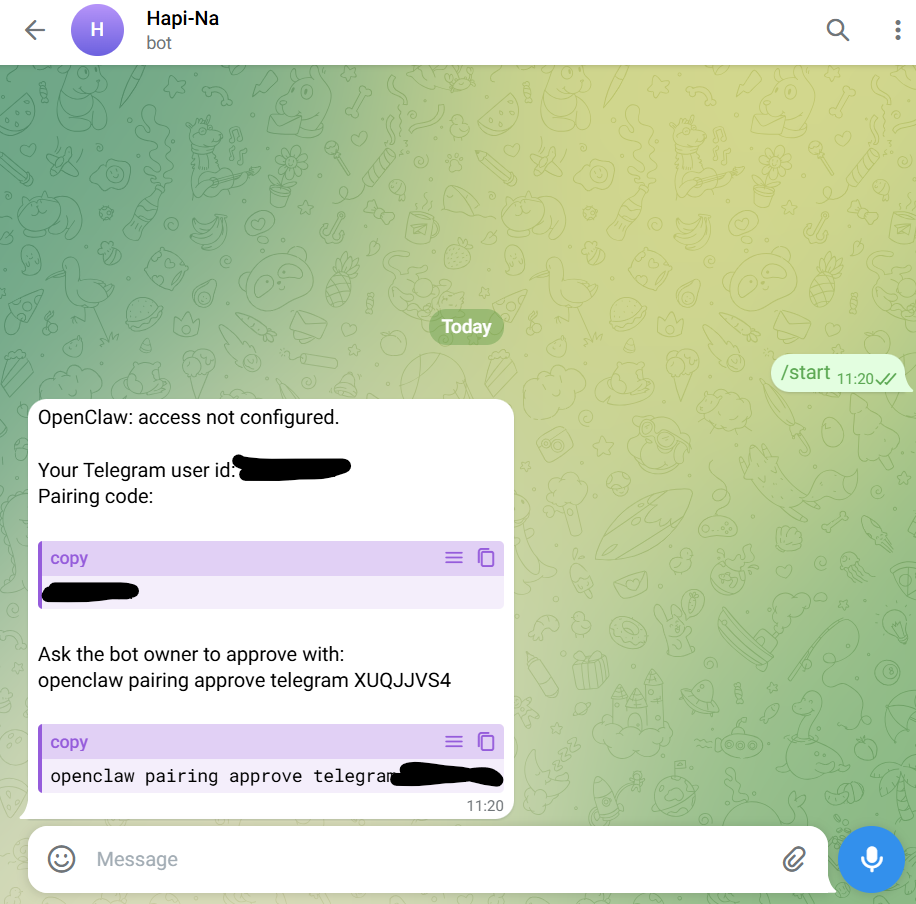
4. In Antigravity, run: “openclaw pairing approve telegram -----”
5. Antigravity updates .env and config, then restarts the gateway.
6. Send a message to the bot on Telegram – the agent replies immediately.
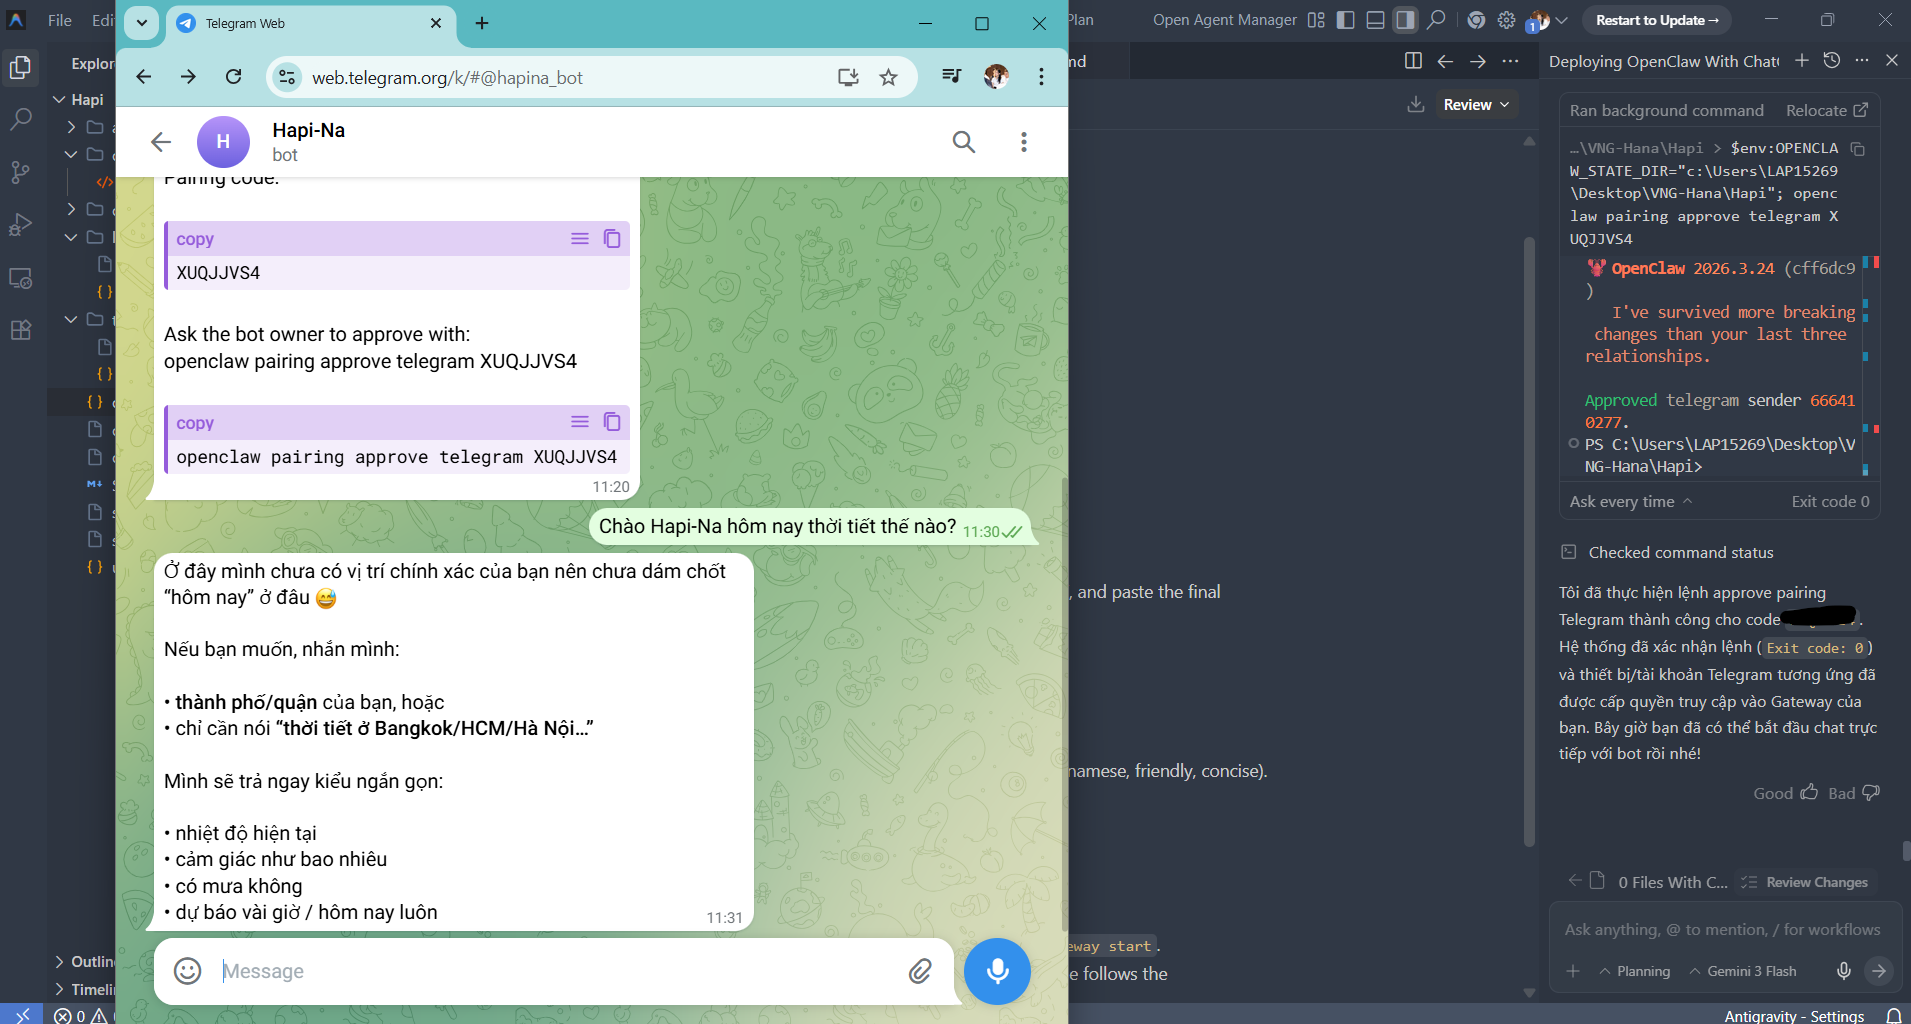
Success: The agent replies over Telegram, using the tone you defined.
Error: Agent still uses the old tone → Restart the gateway after saving SOUL.md.
Error: Telegram doesn’t respond → Check the bot token and chat ID in .env.
By this point you already have a working AI agent with its own personality that you can chat with via Telegram. The next part is for those who want to go deeper.
SECTION 3 – Go Deeper (Optional)
The four steps above are enough to get an agent running. The next section is for anyone who wants to upgrade further – enabling memory, adding model providers, or building automation skills.
Step 5 – Turn on memory so the agent remembers context
By default, OpenClaw is “goldfish‑brained” – every time you close the chat, it forgets everything. That’s a pain if you’re tracking projects or workflows that span many days.
How to do it:
1. In Antigravity, type: “Turn on memory search for the agent. Use Gemini embeddings. Index the /my-work-notes folder and meeting note files.”
2. Antigravity updates the config, adding a memorySearch block with provider, model, and extraPaths.
3. Restart gateway
Once enabled, the agent will:
- Auto‑create daily logs in the memory/ folder
- Save important info into MEMORY.md
- Remember what you’re working on, what you like/dislike, and decisions from previous weeks
Success: Ask the agent “What did we decide about that proposal last week?” → it answers correctly.
Error: Agent doesn’t remember → Check that memorySearch.enabled = true in the config.
The community calls this the upgrade from “goldfish to elephant”. If you juggle multiple workstreams at once, this is essential.
Step 6 – Add a custom model provider
OpenClaw supports 14+ providers out of the box, but you can add any provider you want.
How to do it:
In Antigravity, say: “Add OpenRouter as a provider. Use the deepseek-coder model. Context 128K. Set it as a fallback when the main model runs out of quota.”
Antigravity generates the config block, validates it, and applies it. Or you can even tell the OpenClaw agent itself to edit its own config file.
Success: When the main model runs out of quota, the agent automatically falls back without interruption.
Error: Invalid API key → Double‑check the API key in .env.
Cost‑saving tip: Run a hybrid setup – use a strong cloud model for deep reasoning and a lighter local model for simple tasks. Some users report heavy usage for around 45–50 USD/month.
Step 7 – Create Skills to turn the agent into your personal assistant
Skills are SKILL.md files, each teaching the agent a new ability. The community already offers thousands of skills: web search, browser control, calendar management, PDF reading, content summarization, even auto‑scheduling meetings.
But even better, you can create your own skills tailored to your job – without coding.
How to create a custom skill:
1. In Antigravity, describe what you want in simple terms: “I want to create a skill so the agent will automatically:
- Check email every morning at 8 a.m.
- Summarize the 5 most important emails: ones with action items, near deadlines, or from important people
- Send the summary to me via Telegram.”
2. Antigravity writes a SKILL.md file with the correct format, frontmatter, and metadata.
3. Antigravity registers the skill in openclaw.json, enables it, and restarts the gateway.
Success: At 8 a.m., you get a Telegram message with your email summary, no manual work required.
Error: No message → Check the Telegram bot token and chat ID in .env.
At this point, your agent is no longer just a chatbot. It’s an employee – with skills, personality, memory, and the ability to proactively work on a schedule you set, even while you sleep.
From Zero to a Working AI Agent
In short, with OpenClaw + Antigravity, you can:
- Deploy an agent without opening the terminal
- Configure it in natural Vietnamese
- Give it its own personality and memory
- Connect it to Telegram, email, and calendar
- Run multiple agents in parallel for different purposes
Limitations to be aware of:
- You still need the initial setup (Antigravity) – it’s not completely zero‑setup
- Some complex skills need trial and error – they won’t always work perfectly on the first try
- API costs aren’t zero if you use it heavily – you should monitor your quotas periodically
Tips & Tricks
1. Start from one specific pain point, don’t build an “all‑in‑one” agent from day one. Pick the task you hate most each week – “I spend 30 minutes every morning reading email” or “I keep forgetting to follow up after meetings” – and solve just that first. Once it works, you’ll naturally want to build more.
2. You’re better at describing what you want than you think. The hard part of writing SOUL.md or Skills isn’t technical – it’s clarity. Non‑coders often describe requirements more clearly than coders because they think in terms of behavior, not implementation. That’s your advantage.
3. Test with real questions, not theoretical ones. After setup, don’t ask “Are you working?” Ask what you truly need: “Summarize the 3 main points in this file” or “Remind me what I said about project X last week.” The answers will tell you immediately whether the agent is doing what you want.
4. Save any config that works. When Antigravity generates a config block that works well, copy it into your own notes. Next time you deploy a new agent, you’ll have a ready‑made template instead of starting over.
Hands‑on practice
Start putting this into practice right away, and if you get it working, share it so more people can do it too.
| Tài nguyên | Mô tả |
| OpenClaw GitHub | Main repository with documentation and the community Skills list |
| Antigravity | Vietnamese AI agent tool used to deploy and manage OpenClaw |
| OpenRouter | Model marketplace — one API key gives you access to 100+ models |
| Hugging Face Hub | Find local models to run with Ollama |
